HTML Basics
This course has been migrated to www.thedevspace.io .
- HTML Basics ⬅️ You are here
- CSS Basics
- Advanced HTML and CSS
- How to Position and Arrange Content Using CSS
- Responsive Design
- Recreating YouTube Using HTML and CSS
- Some CSS Tools and Frameworks
- HTML & CSS Best Practices
HTML and CSS are the most fundamental building blocks of a webpage. It is your first step towards becoming a web developer. HTML (HyperText Markup Language) defines the structure and content of the webpage, while CSS (Cascading Style Sheets) defines the webpage’s presentation and appearance. Together, they form the colorful webpages you see today.
This course on HTML and CSS will cover everything you need to know about these technologies. By the end of this course, you will be able to create webpages that are visually appealing on devices of all sizes. It doesn’t matter if you’re a beginner or have some experience since this course is designed to help you learn and grow. Don’t worry if you don’t have any prior knowledge, as we’ll start from the basics and work our way up together.
Before we continue, please consider buying the e-book version of this course.
By purchasing this e-book, you will get access to all the accompanied source code. Thank you for your support! Happy coding! 🖥️✨
What is HTML? #
HTML, short for HyperText Markup Language, is the standard markup language used to create webpages. It defines the structure and content of webpages using elements and tags, such as headings, paragraphs, images, links, forms, and more. These elements instruct web browsers on how to display the content of a webpage.
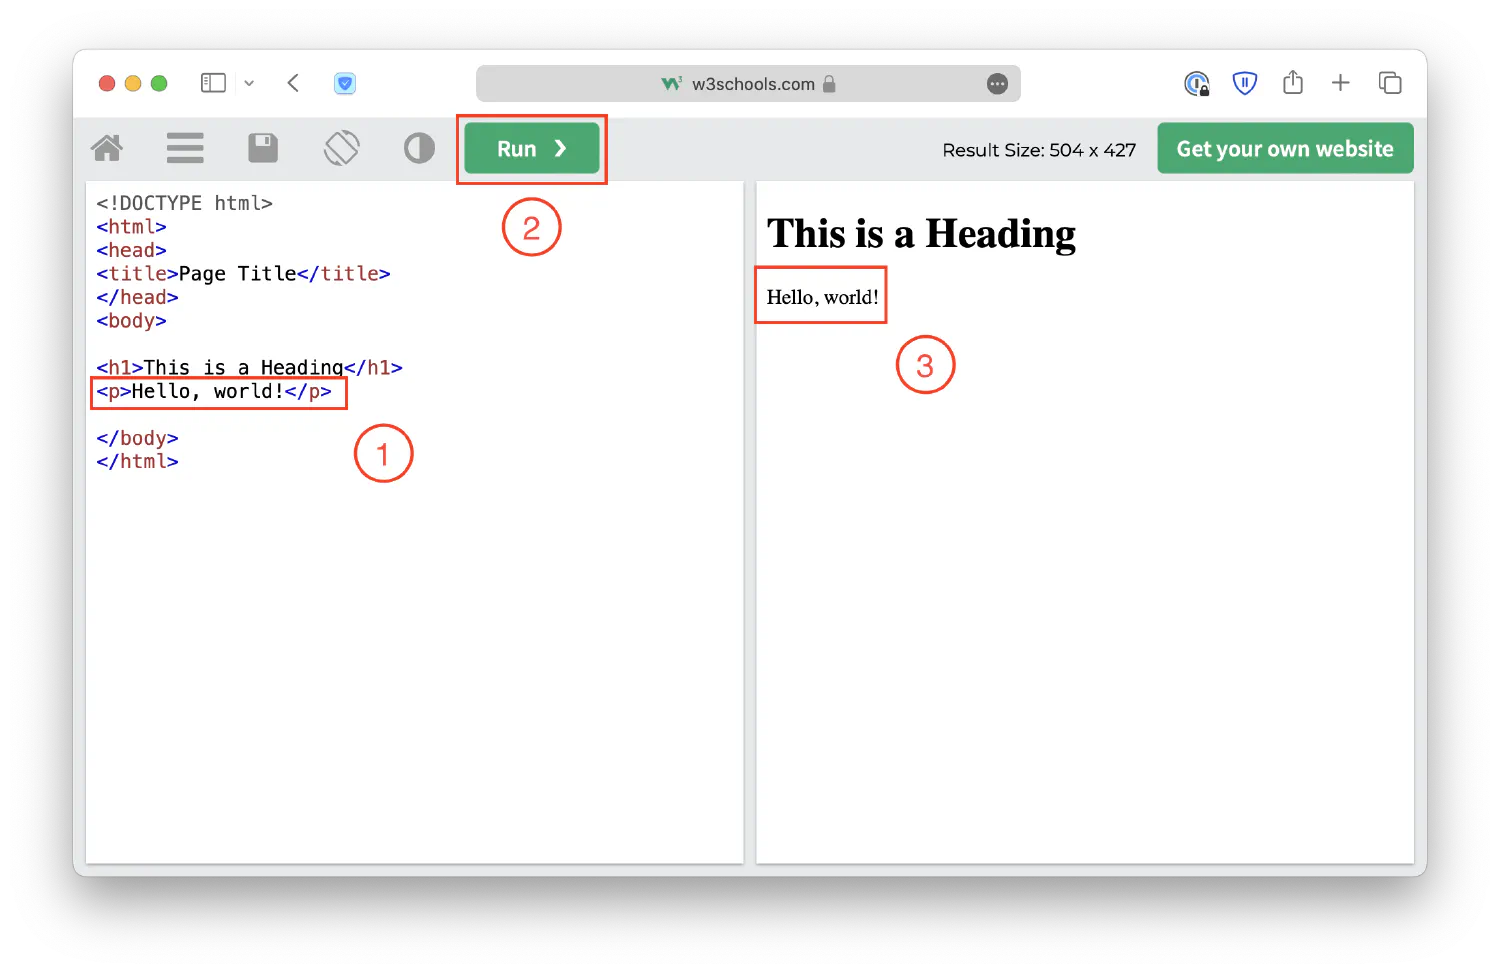
To start writing HTML code, you can head over to W3Schools’ online HTML editor .
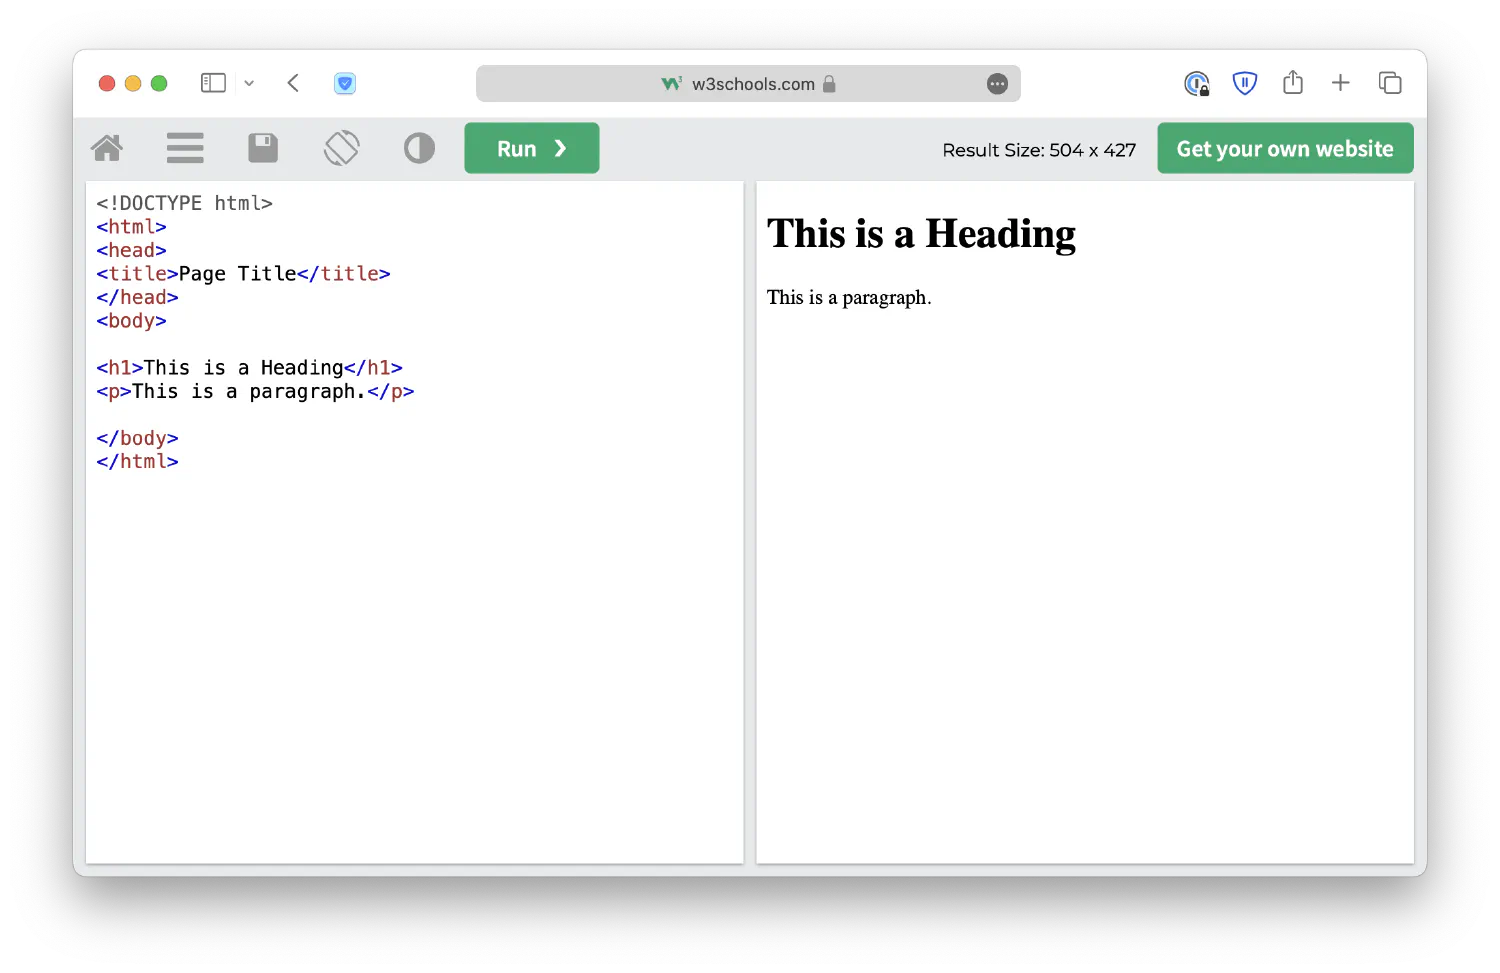
On the left side, you will find the HTML source code, which is essentially the blueprint for what will be displayed. The browser takes this blueprint and transforms it into the webpage you see on the right side.
You can modify the source code directly to see how it affects the displayed webpage. Once you’ve made your desired changes, simply click the Run button, and the right panel will reflect the alterations.
Congratulations! Now you are officially a programmer capable of building webpages. However, this is only the beginning, there is still a lot more to be done before you can create fully functional and visually pleasing webpages.
Prepare your computer for web development #
First of all, you must ensure your computer is ready for web development. A basic online editor is not going to be enough this time. To get started, make sure you have a web browser installed. Any popular web browser on the market, such as Google Chrome , Microsoft Edge , Safari, or Firefox , should be sufficient for this course. You may download and install the browser of your choice from the linked websites.
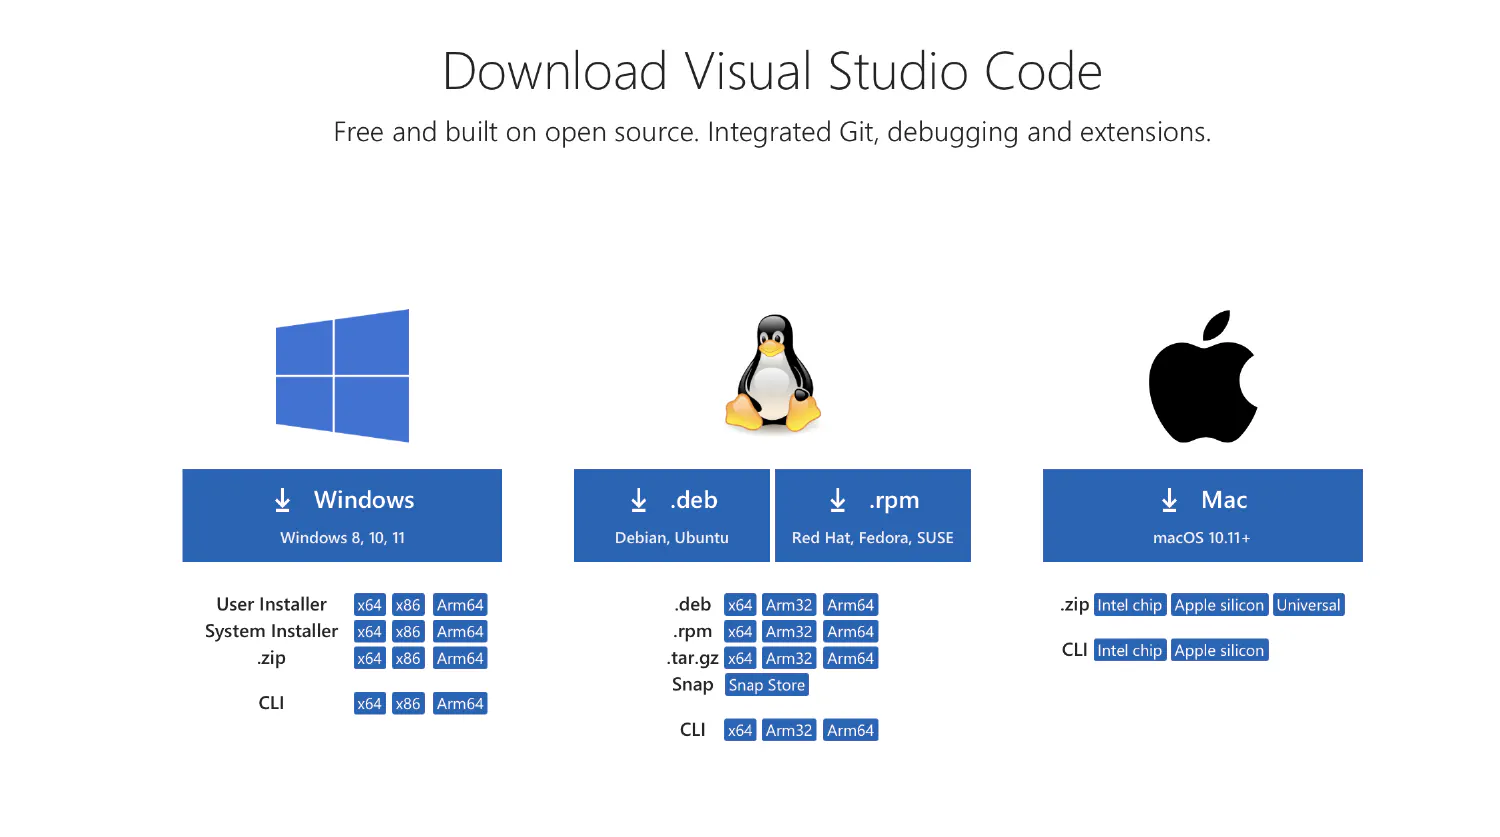
In addition, you’ll need a code editor to write and edit your code. Visual Studio Code is a great option for beginners, and it’s the most popular code editor out there. Simply download the appropriate installer for your operating system from their official website.
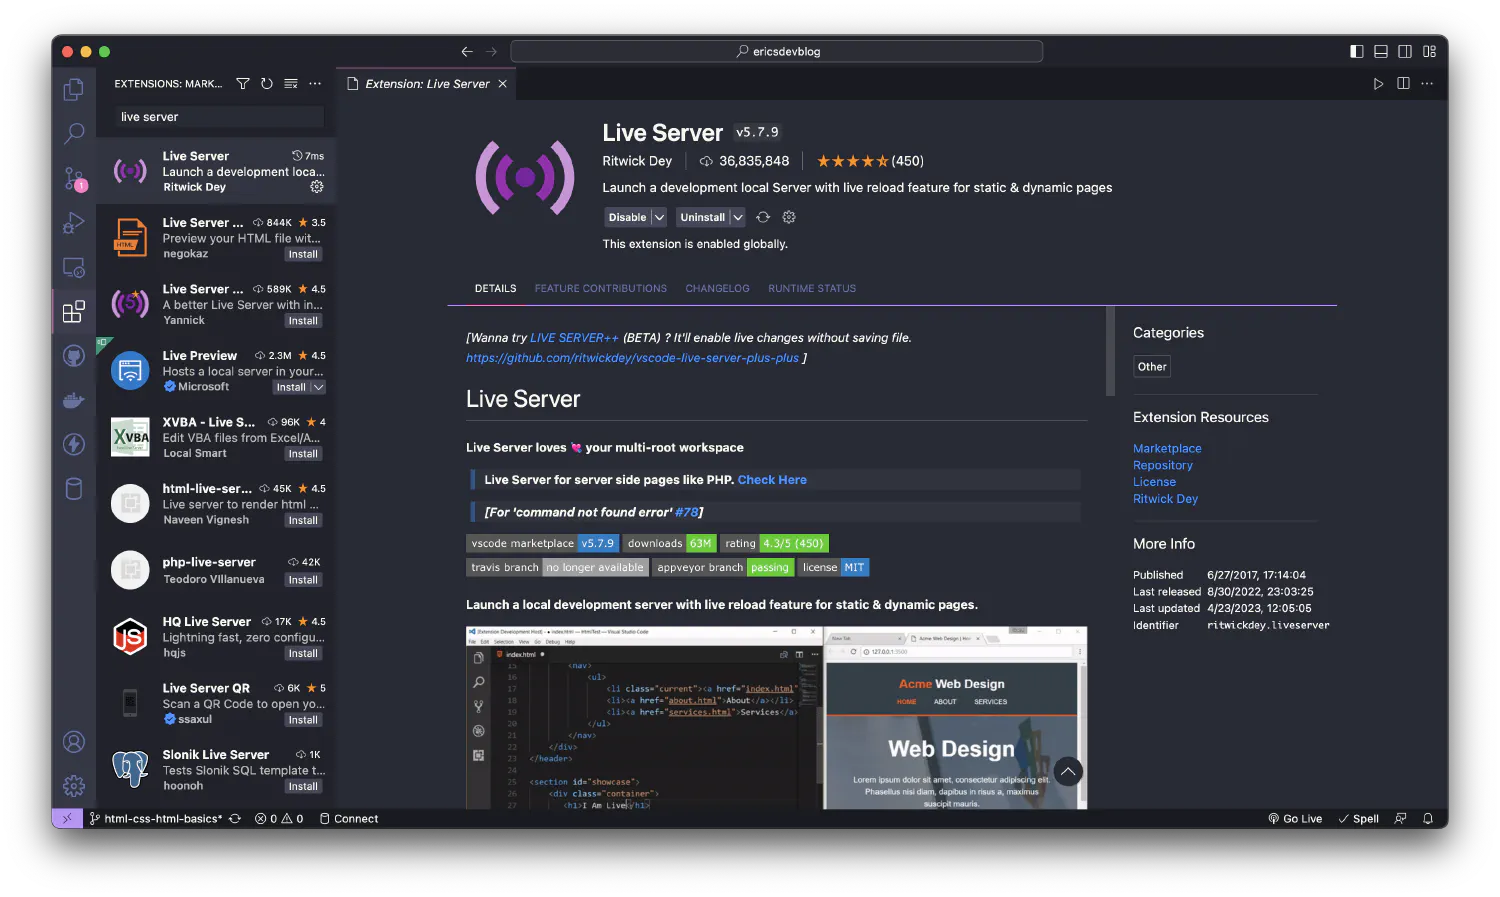
After you’ve installed VS Code, make sure to install the Live Server extension as well. Navigate to the Extensions tab on the left sidebar, and type in Live Server in the search box. From there, you’ll be able to download and install the extension with ease.
This extension will create a local development server with the auto-reload feature. For example, create a new work directory and open it using VS Code.

Create a new file named index.html under this directory. The .html extension indicates that this is an HTML document. Type in ! in the VS Code editor, and you will see suggestions like this:
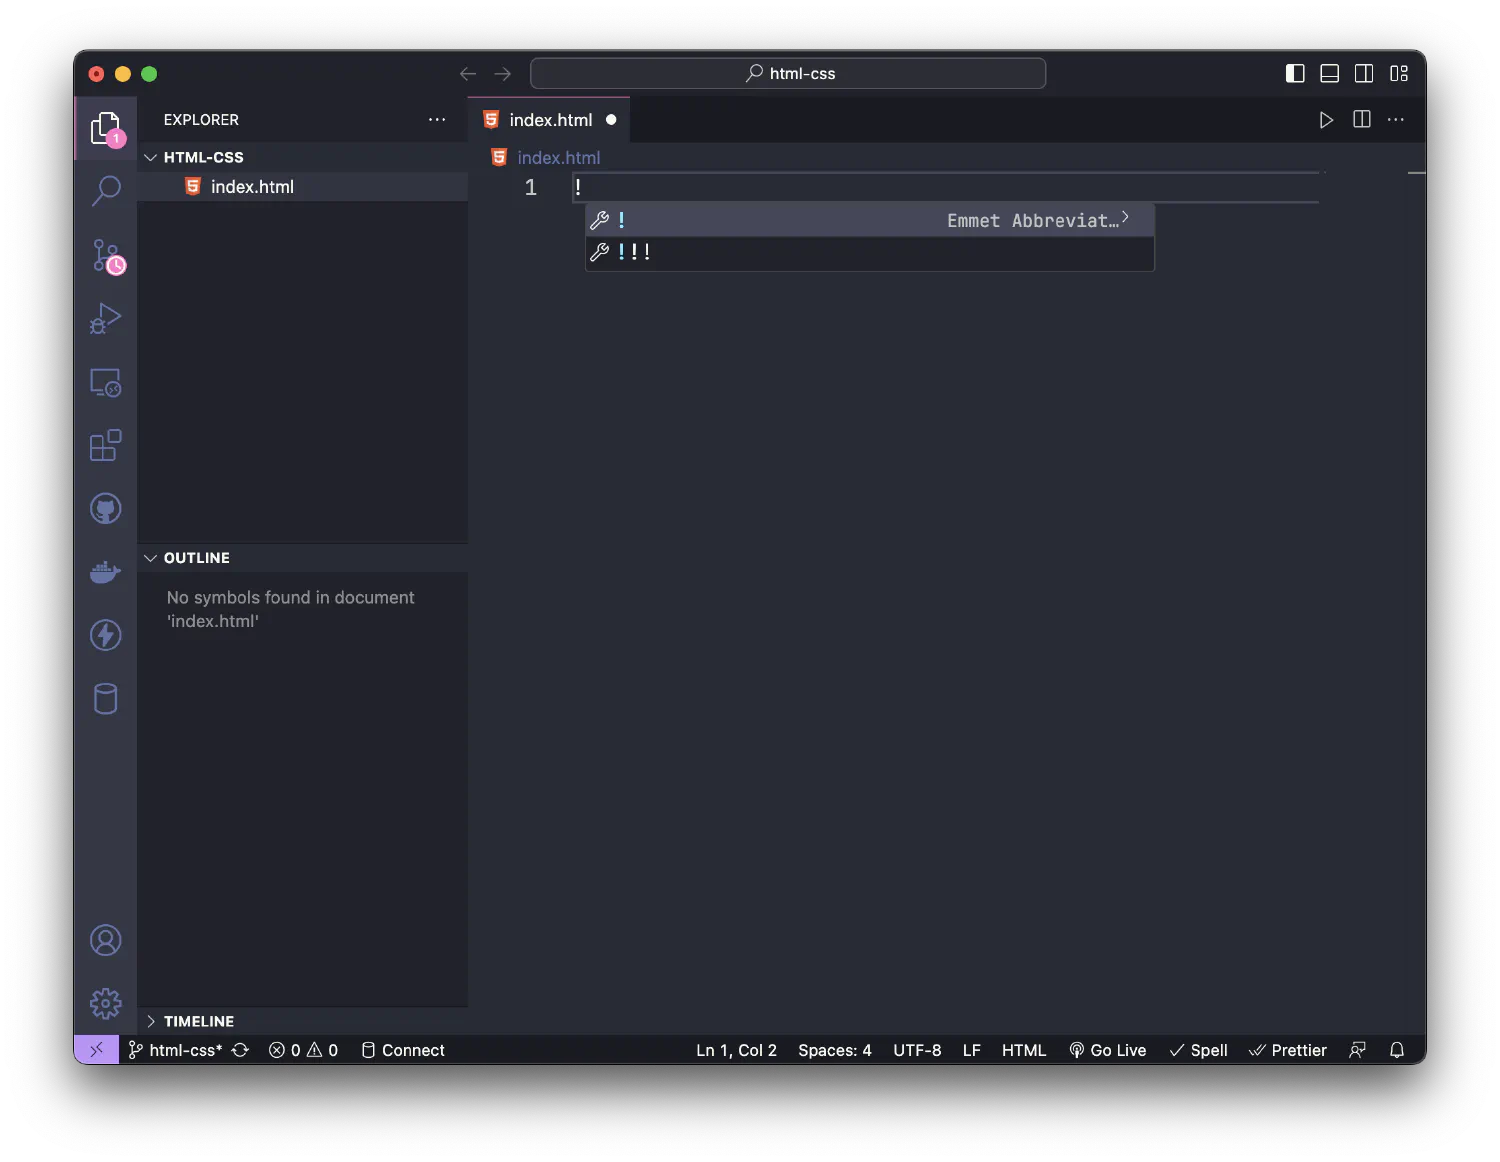
This is a shortcut that allows you to create HTML documents quickly. Select the first option, and the following code should be created.
| |
Notice that at the bottom right corner of the VS Code window, there is a Go Live button.

Clicking this button will activate the Live Server extension. A dev server will be started, hosting the index.html file you created.
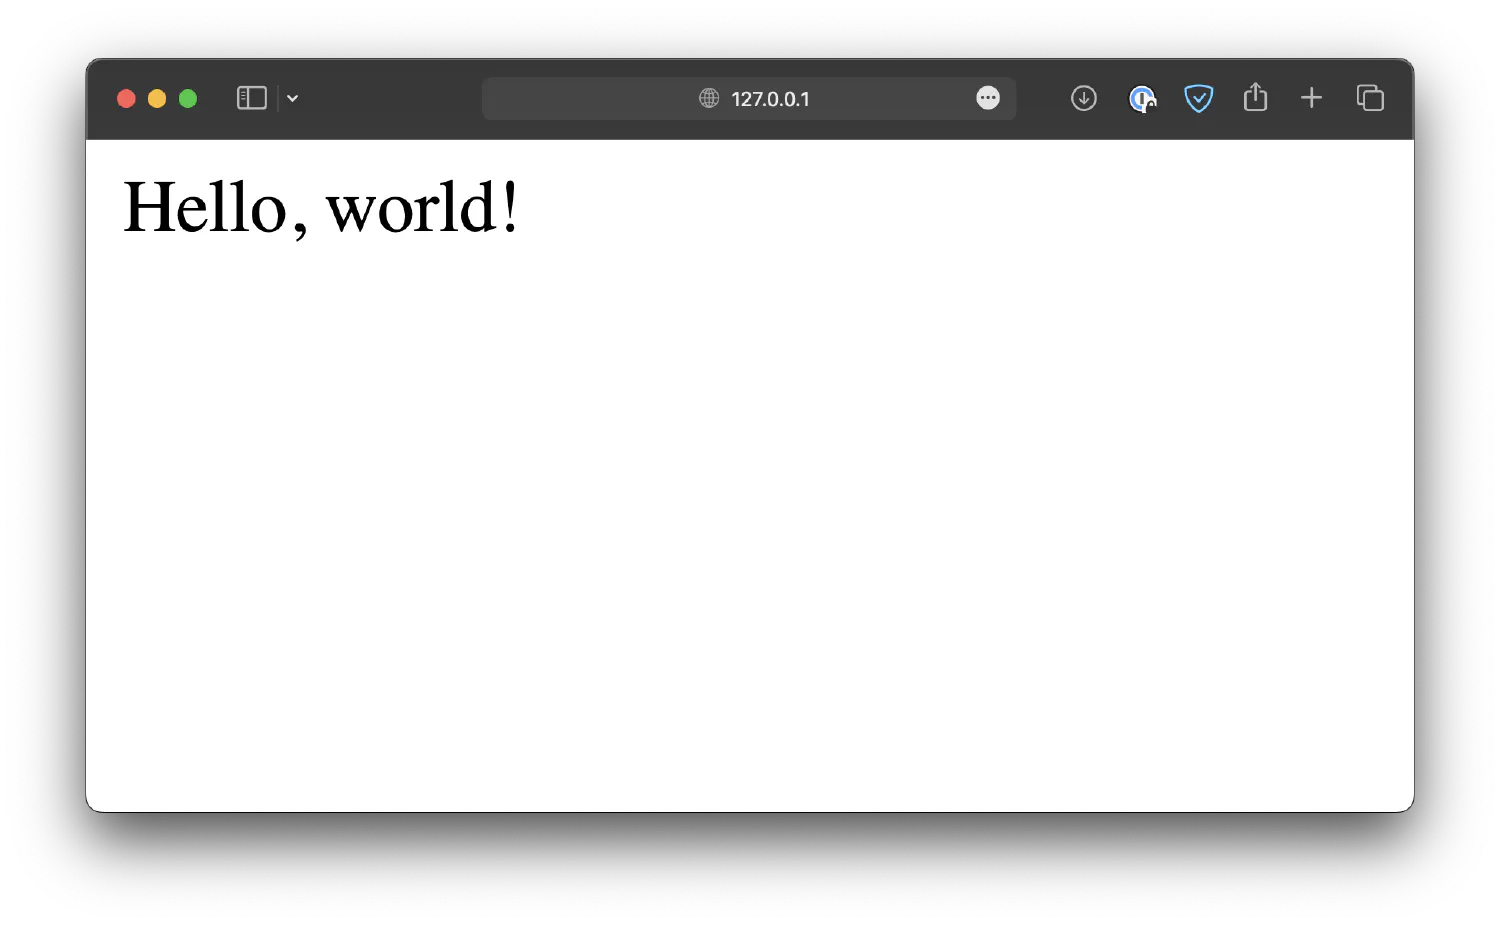
Of course, right now, the file is still empty. Add something between the <body> and </body> tags.
| |
The webpage will be refreshed with the new content.
The structure of an HTML document #
A typical HTML document always has the following structure:
| |
The <!DOCTYPE html> tag defines the document type, and when a web browser encounters <!DOCTYPE html>, it understands that the page should be parsed and displayed according to the rules and specifications of HTML5, the latest version of HTML. This ensures that modern browsers interpret the webpage’s content and layout correctly.
Everything else in the file should be enclosed inside an <html> element, defined by an opening tag (<html>) and a closing tag (</html>). lang="en" is called an attribute, which tells the browser and search engine that English is the primary language used for the content of this webpage.
Inside the <html> element, there are two child elements, <head> and <body>. <head> contains metadata and other information about the HTML document. This information will not be displayed in the browser but is often used by search engines for SEO (Search Engine Optimization) purposes. <body>, on the other hand, contains the main content of the webpage that is visible to the users, and for that reason, it is also the part of the HTML file we are going to focus on in this course.
Elements and attributes #
Let’s take a closer look at the example and notice that the HTML document is made up of different elements in a nested structure. In HTML, most elements have both an opening tag and a closing tag:
| |
In this example, <tag> is called the opening tag, and </tag> is the closing tag, and together, they form an HTML element. The element could hold content between the opening and closing tags.
| |
The element can also contain other elements, forming a nested structure.
| |
Inside the opening tag, you can define attributes, which are used to specify additional information about the element, such as its class, id, and so on.
| |
The attribute is usually in a key/value pair format, and the value must always be enclosed inside matching quotes (double or single).
There are some exceptions to these general formats. For example, the <br> element, which creates a line break, does not need a closing tag. Some attributes, such as multiple, do not require a value. We will discuss these exceptions later in this course as we encounter specific examples.
However, you should remember that if an element does require a closing tag, then it should never be left out. In most cases, the webpage could still render correctly, but as the structure of your HTML document grows more complex, unexpected errors may occur.
Headings and paragraphs #
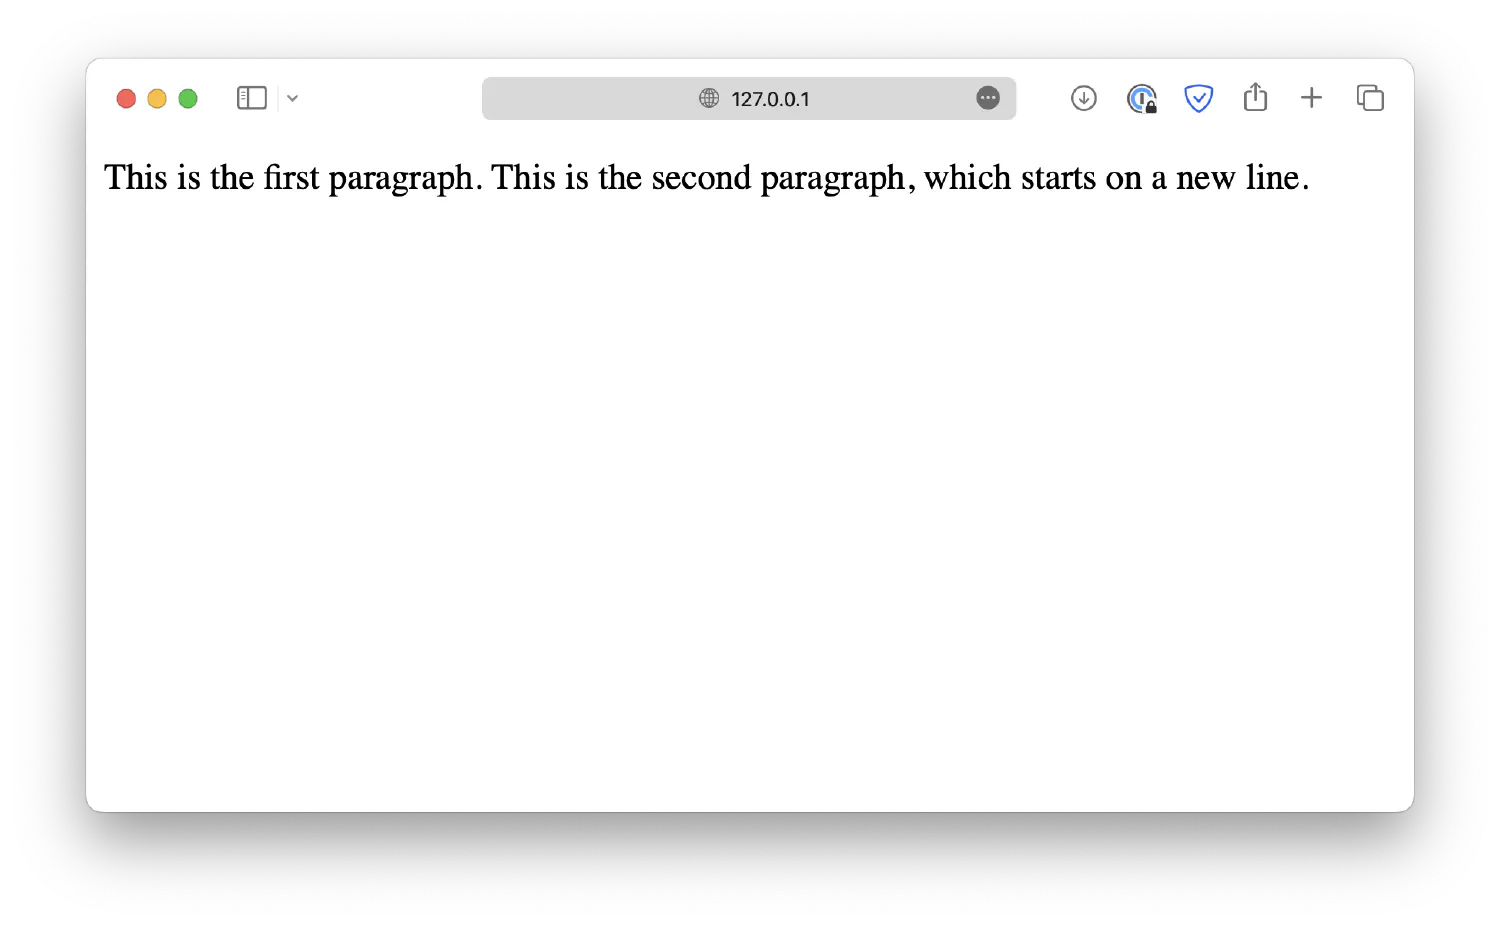
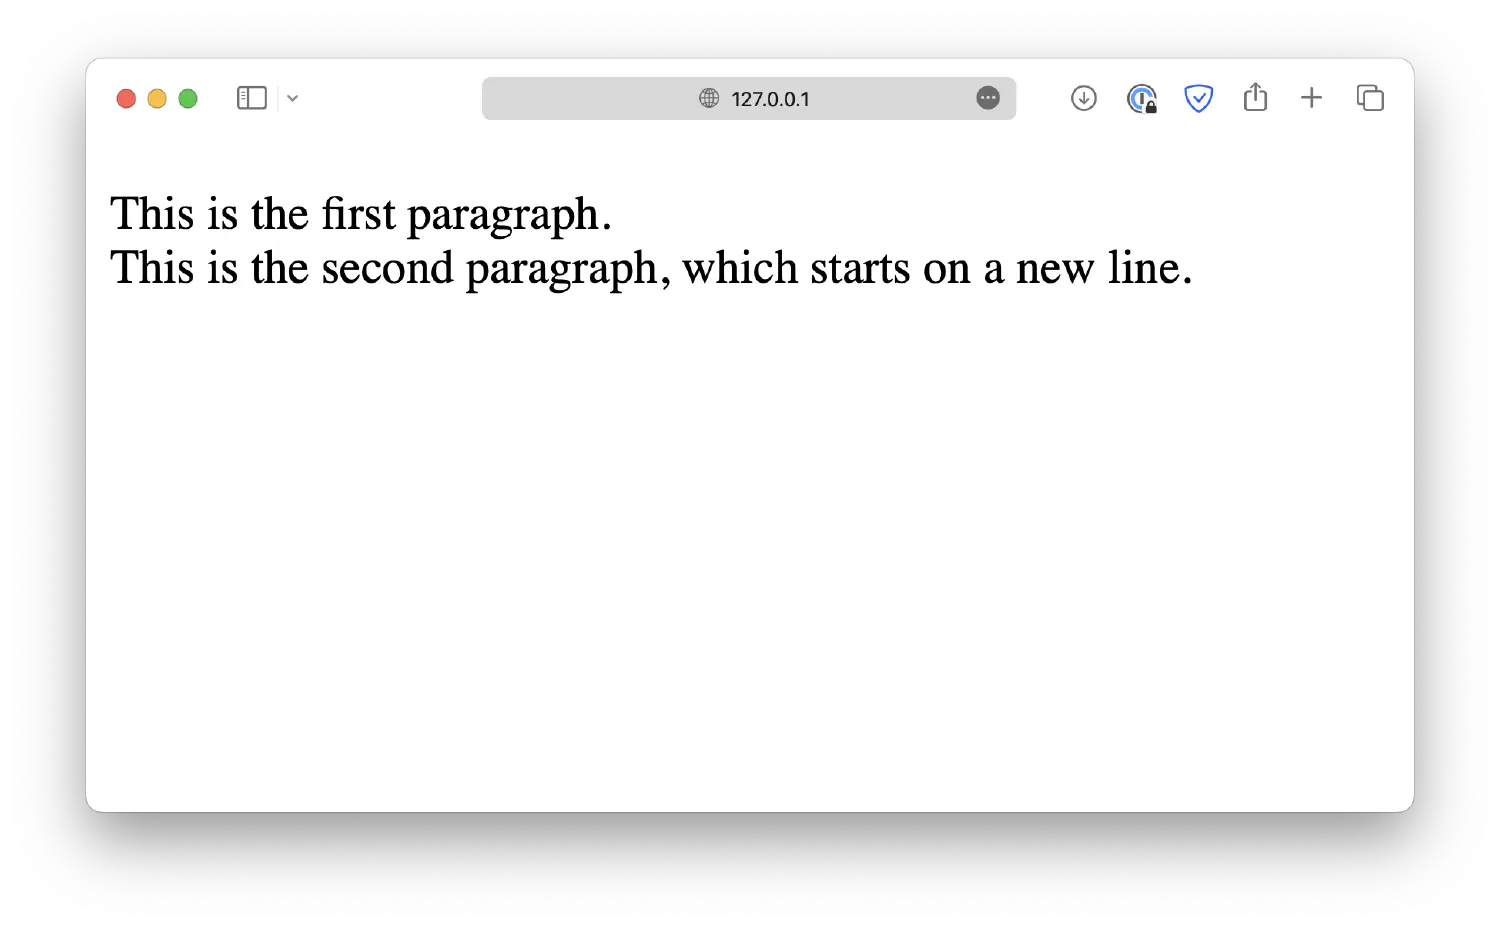
The paragraph is probably the most commonly used HTML element, defined by <p></p>. It is a block-level element, meaning each paragraph will start on a new line.
| |
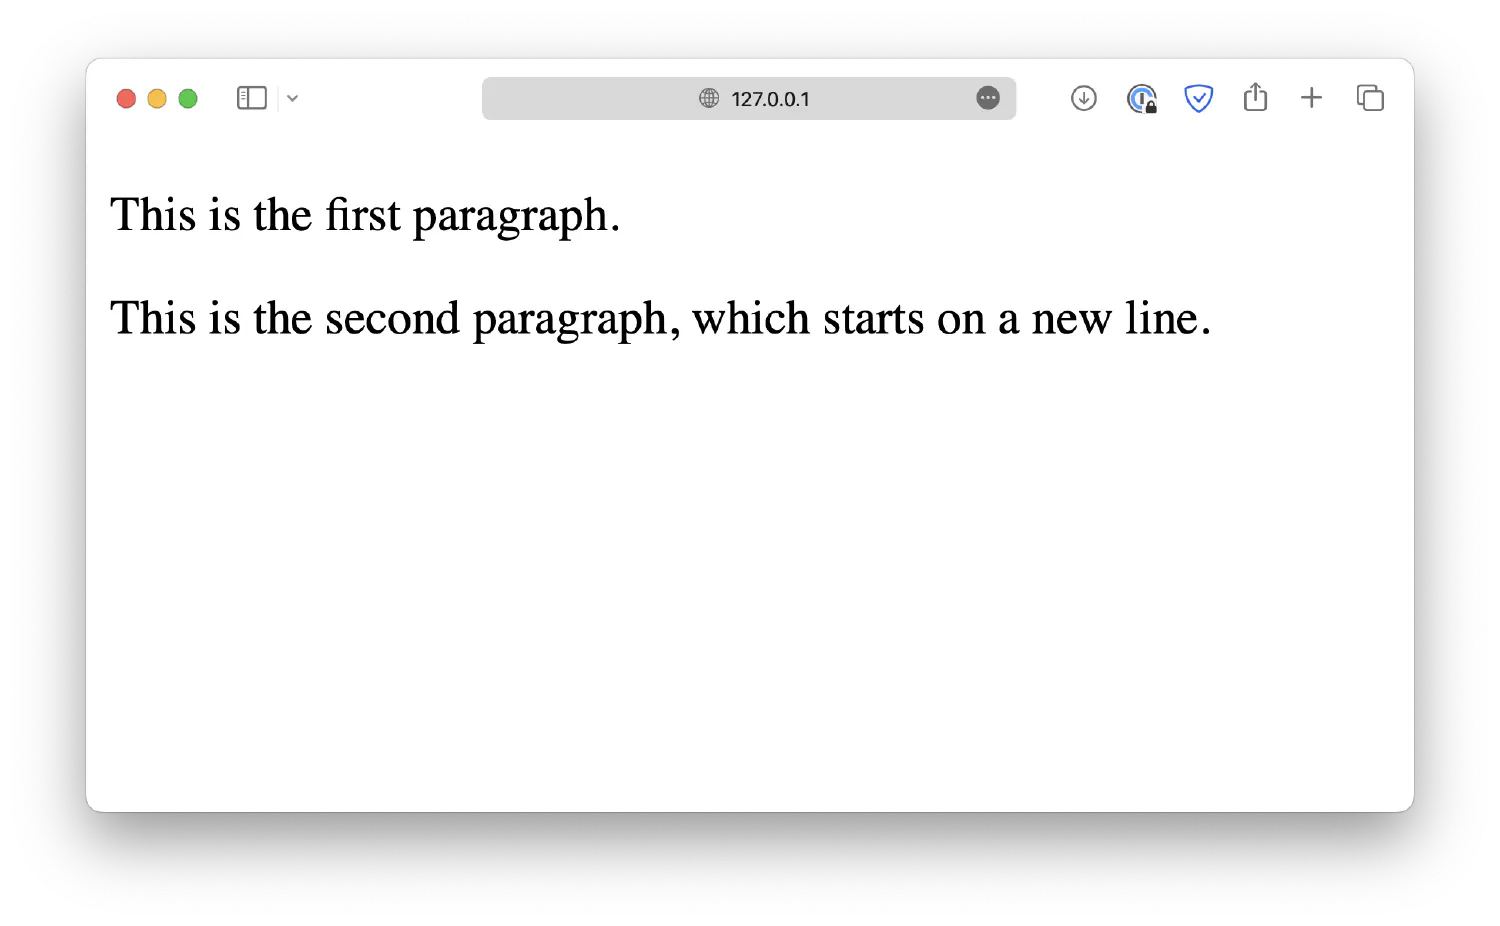
Without the <p> element, your browser will automatically ignore the extra white spaces and render the text in a single line.
| |
You’ll need to use the <br> element if you want a line break inside one paragraph. This is one of those HTML elements that does not require a closing tag.
| |
When writing an article, it is good to add headings between paragraphs to make the article more organized. An HTML document works the same way. HTML offers six different levels of headings from <h1> to <h6>.
| |
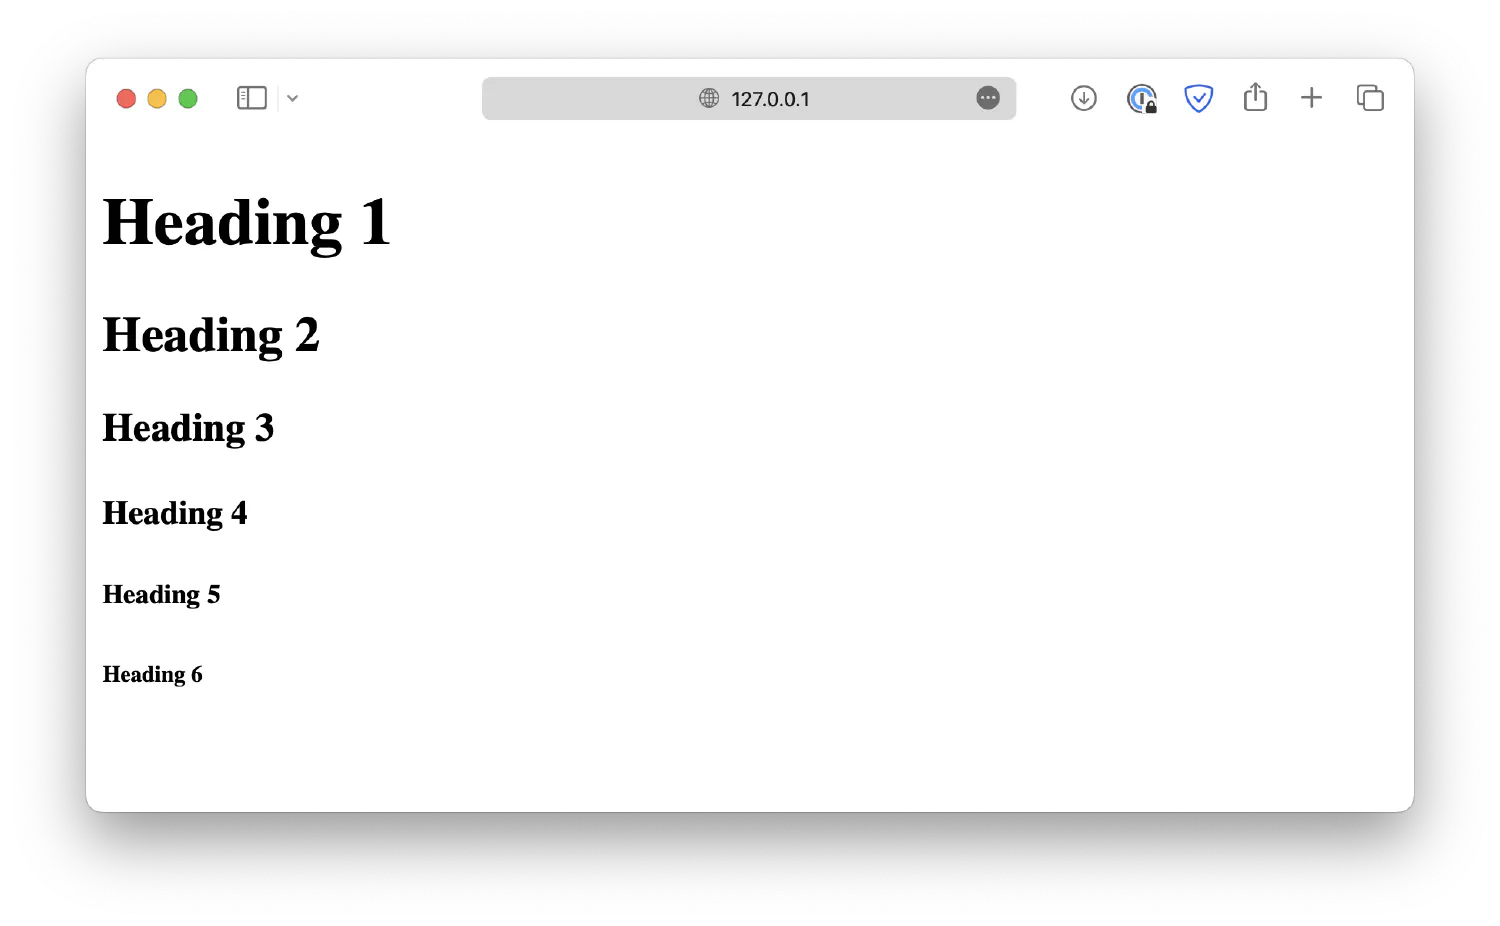
In most cases, <h1> to <h3> should be enough when creating your webpage, and personally, I would avoid using <h4> to <h6>, as they would make the structure of your webpage unnecessarily complex.
<h1> is the top heading with a special status. It should summarize the entire webpage, so there should only be one <h1> element in each HTML document.
Formatting elements #
Creating an HTML document is like writing an essay. Sometimes you must emphasize specific words and paragraphs by giving them different formats, such as making them appear bold, italic, or underlined. HTML provides formatting elements that can help achieve this effect.
| |
The
<b>and<strong>elements have the same effect. They both make the enclosed text appear bold.1 2 3 4<p> Lorem ipsum <b>dolor sit</b> amet consectetur <strong>adipisicing elit</strong>. </p>
Even though they have the same appearance, they serve different purposes for browsers and search engines.
<b>simply makes the text bold without adding any particular meaning, while<strong>indicates the enclosed texts have substantial importance.The
<i>and<em>elements are similar. They both turn the text into italic form.<i>does not indicate any special meaning, while<em>defines an emphasized text displayed in italic form.1 2 3<p> Lorem ipsum <i>dolor sit</i> amet consectetur <em>adipisicing elit</em>. </p>
The
<mark>element defines highlighted/marked texts.1<p>Lorem ipsum <mark>dolor sit</mark> amet consectetur adipisicing elit.</p>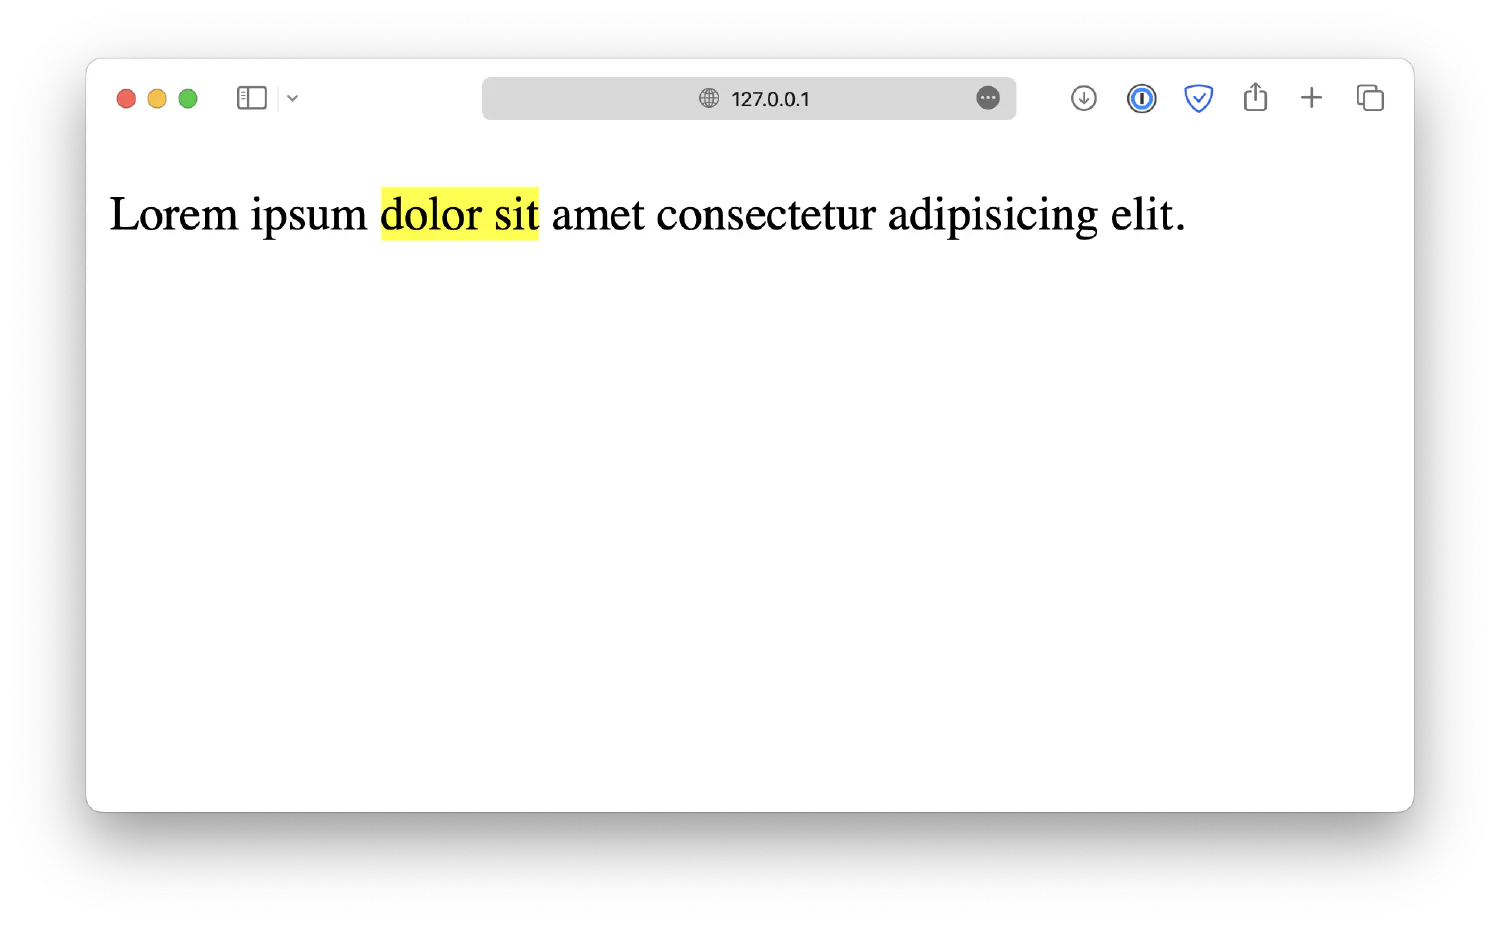
The
<small>element defines smaller text.1<p>Lorem ipsum <small>dolor sit</small> amet consectetur adipisicing elit.</p>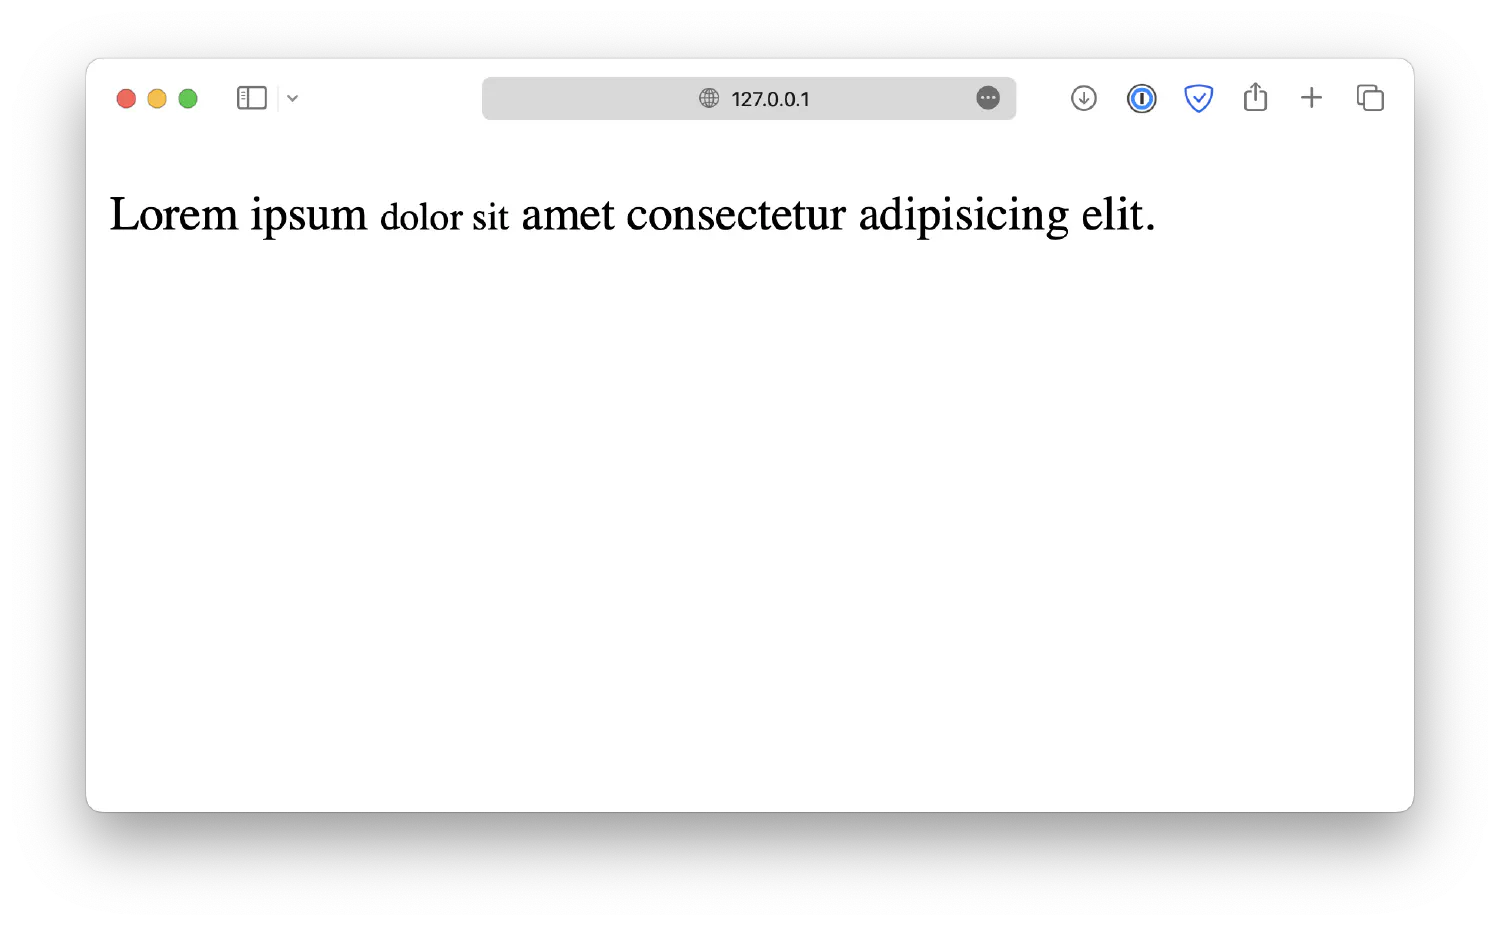
The
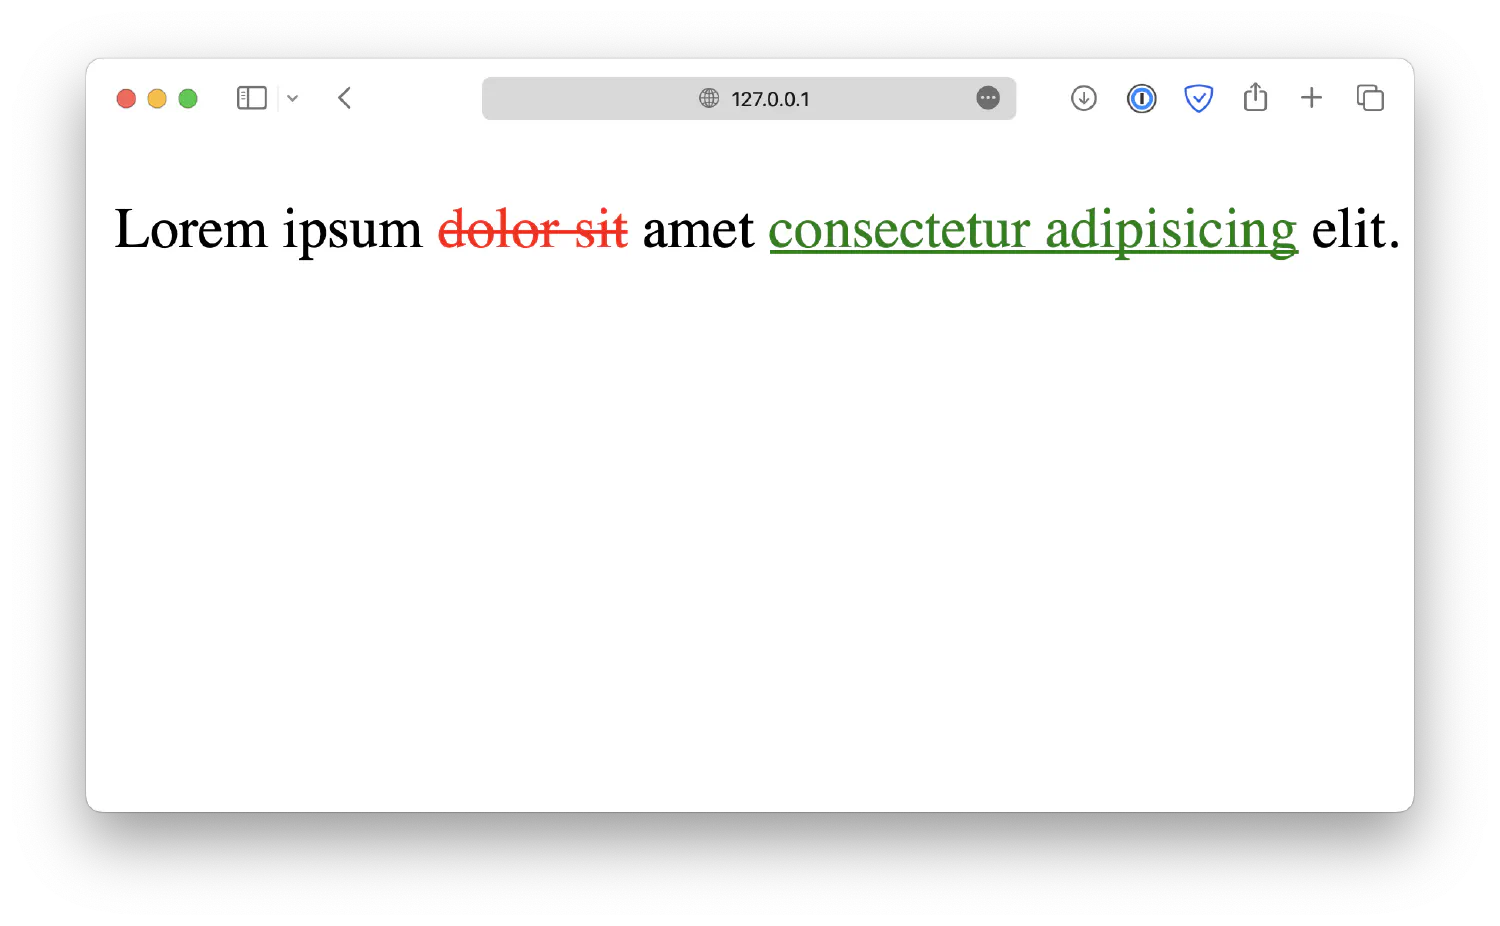
<del>element indicates deleted text, displayed as strikethrough text. On the other hand, the<ins>element is used to indicate inserted text, which is displayed as underlined text.1 2 3 4<p> Lorem ipsum <del>dolor sit</del> amet <ins>consectetur adipisicing</ins> elit. </p>
The
<sub>and<sup>elements each defines subscript and superscript.1 2 3 4<p> Lorem ipsum <sub>dolor sit</sub> amet <sup>consectetur adipisicing</sup> elit. </p>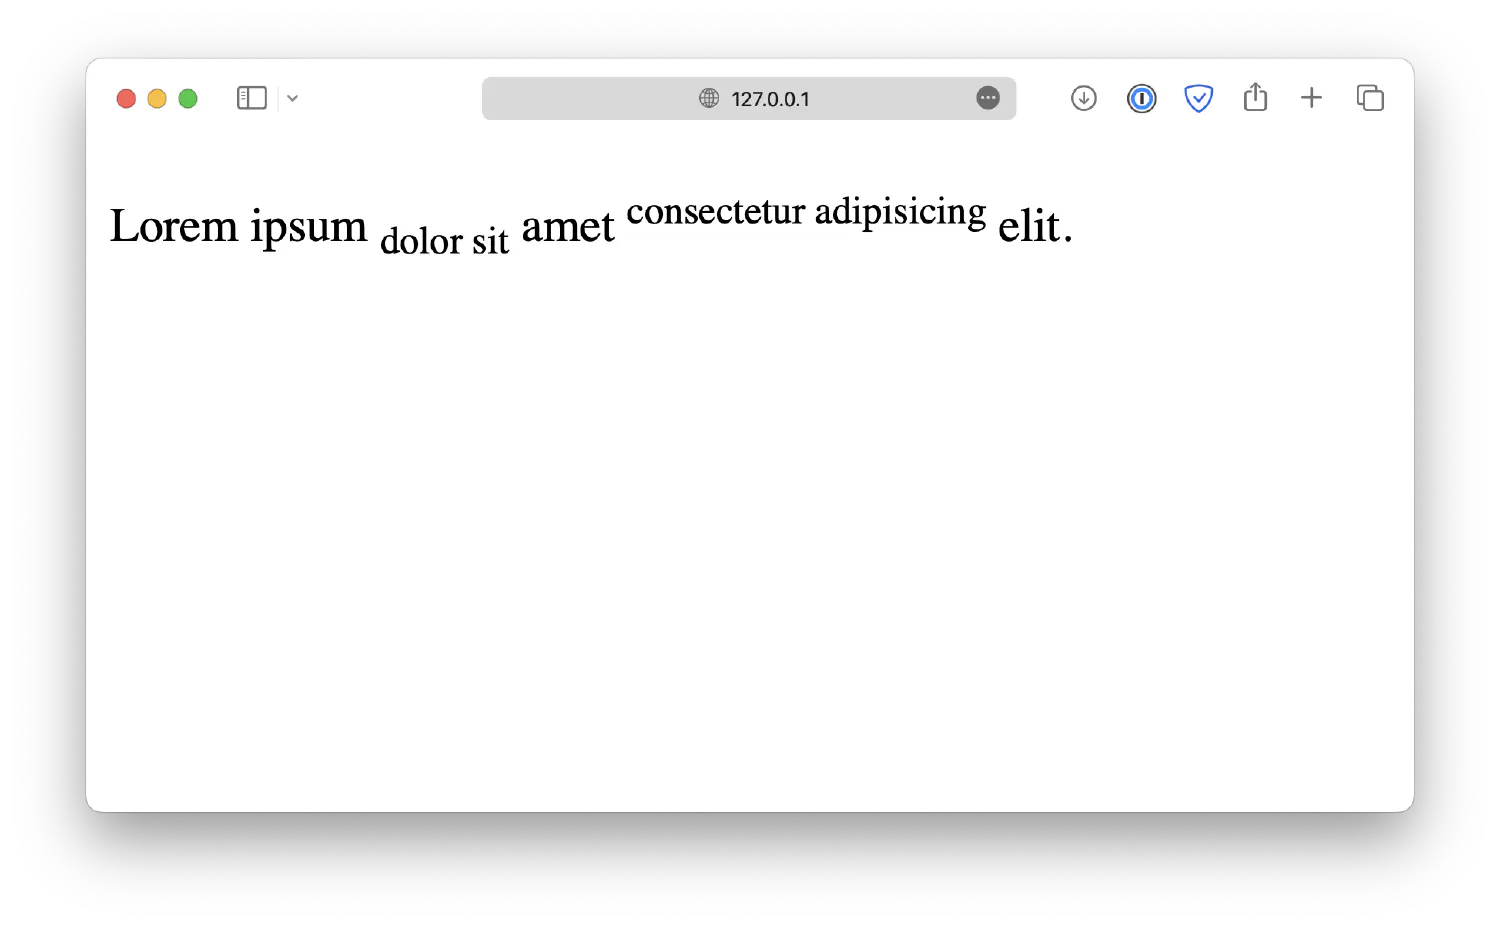
Styling HTML elements #
Sometimes, the default representations of these formatting elements are inadequate to express their intended meanings. For example, the <del> element indicates deleted texts with a strikethrough, which is easy to understand. However, the <ins> element uses underlined texts to represent insertions, which can be confusing. To improve the default appearances of these elements, you can specify a style attribute like this:
| |
Of course, this works for almost all HTML elements, not just the formatting elements. The style of an HTML element is defined in a key/value pair format.
| |
The semi-colon (;) marks the end of a statement, and you can define another style statement afterward.
| |
There are many more styles you could define for each element, and we will discuss more about them in the next chapter.
Links #
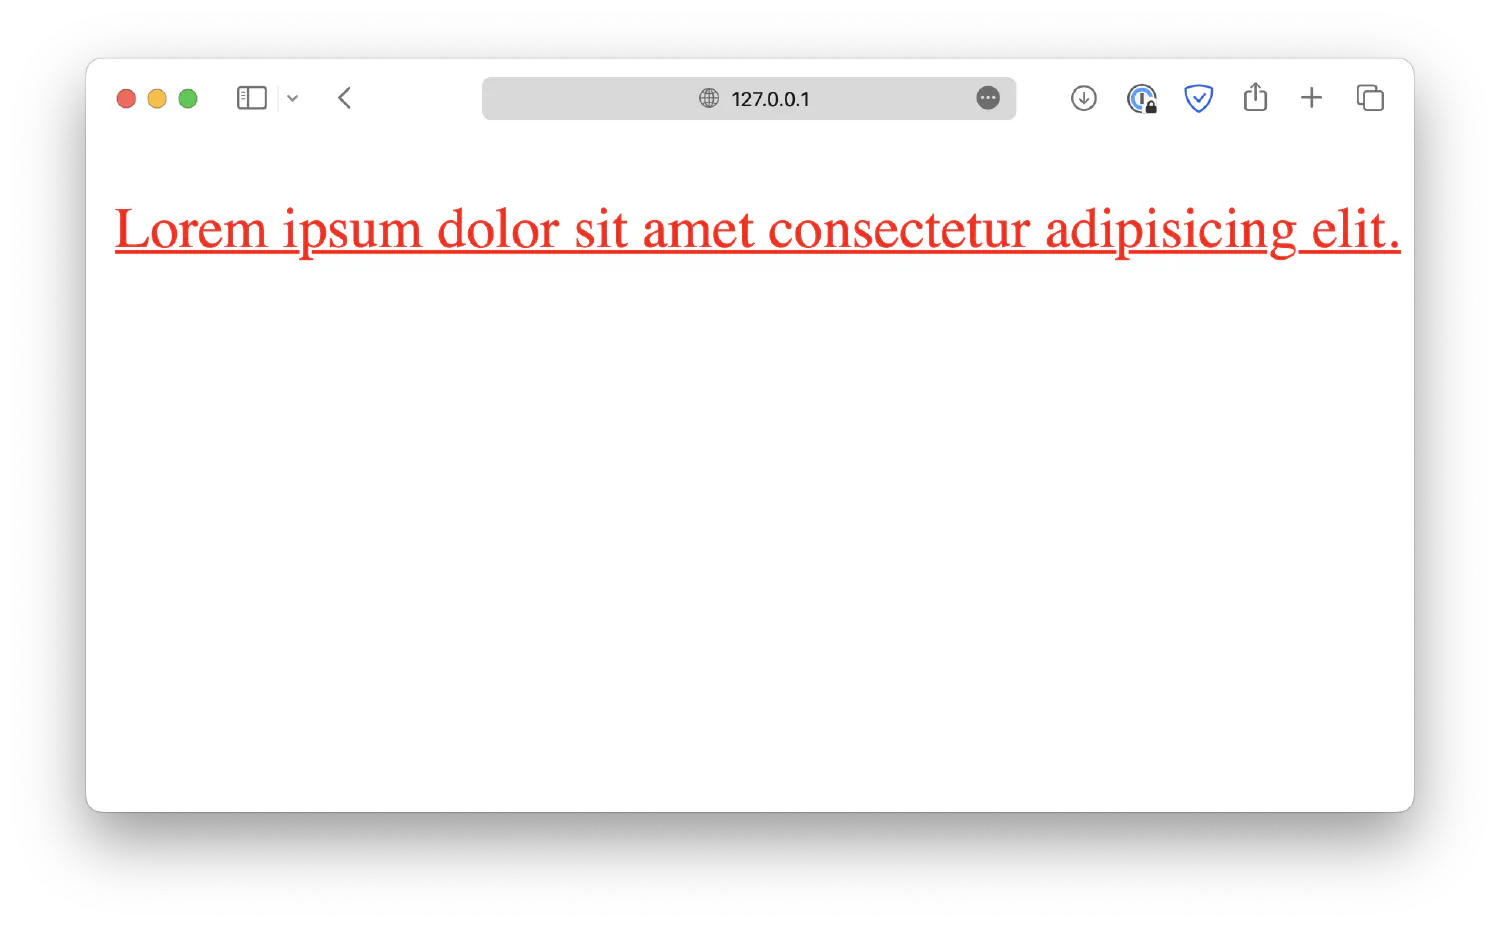
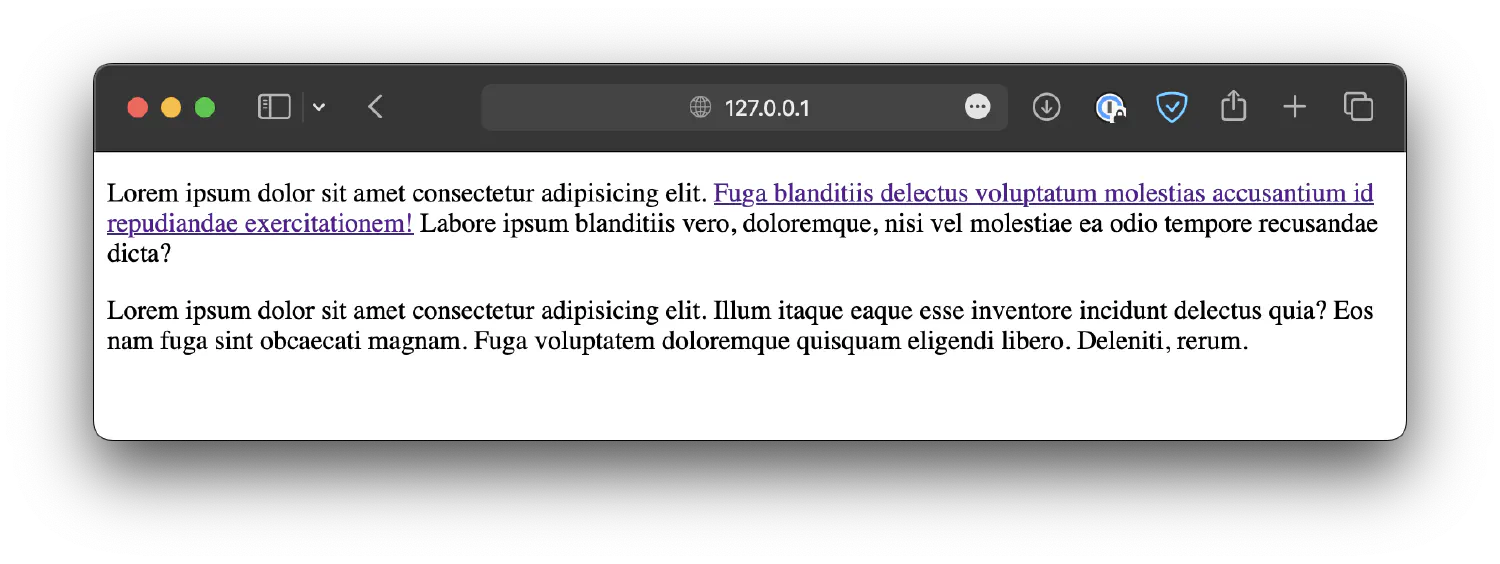
Hyperlinks are another type of HTML element we must discuss. They are found on almost all websites, connecting one webpage to another. When you hover the cursor over a link, the arrow will turn into a hand. When you click the link, it will take you to another HTML document.
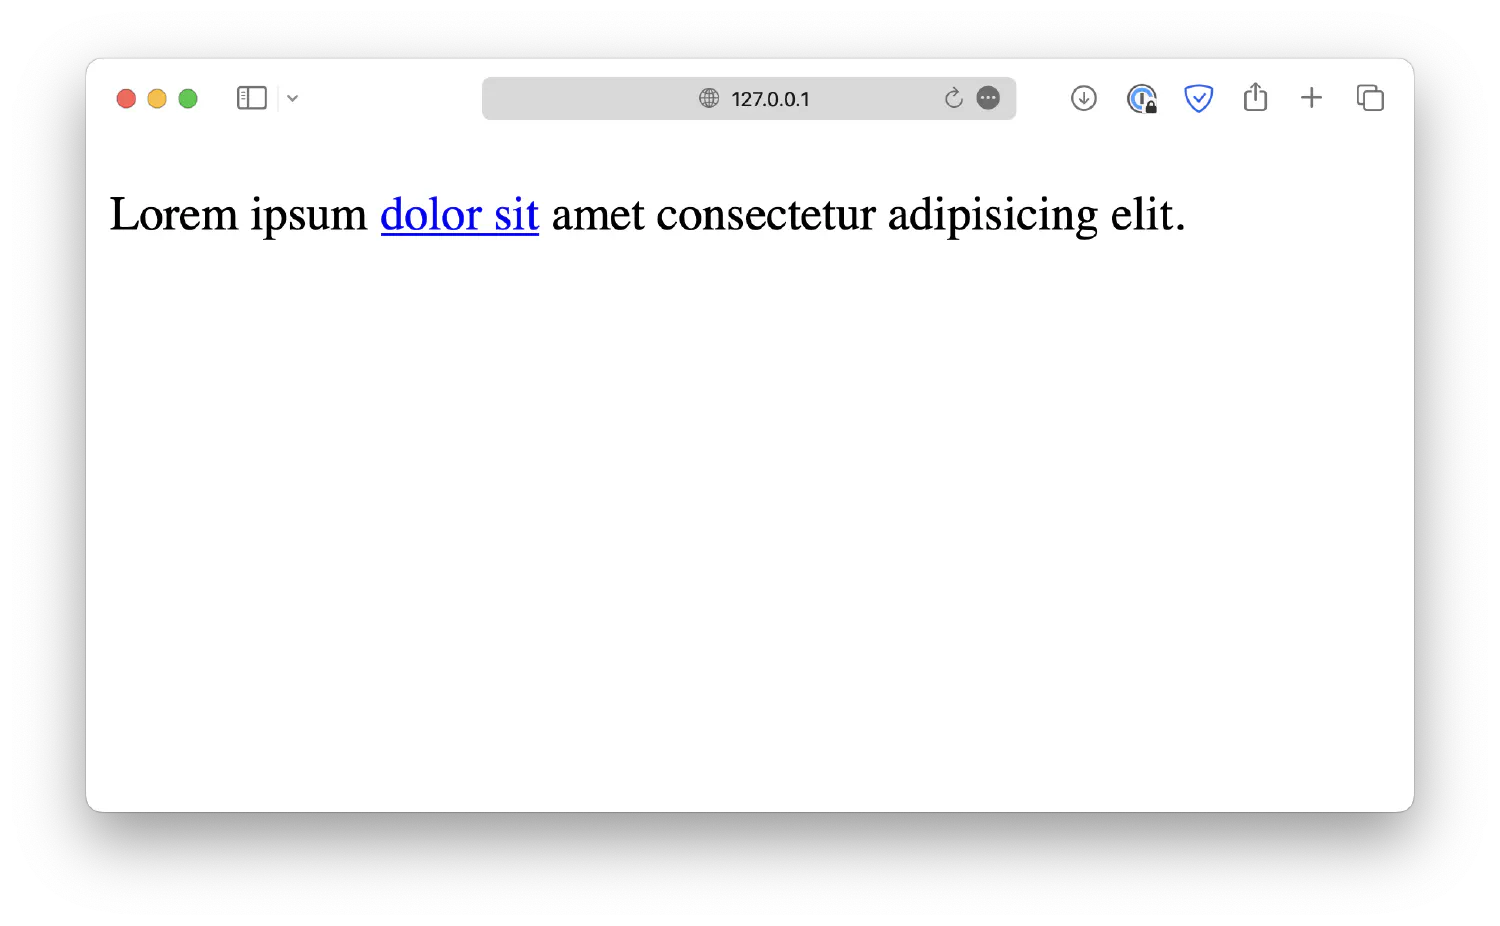
Links in HTML are defined using the <a> element.
| |
By default, the Link Text will be underlined and displayed in blue, and when you click on it, you will be taken to the destination defined by the href attribute.
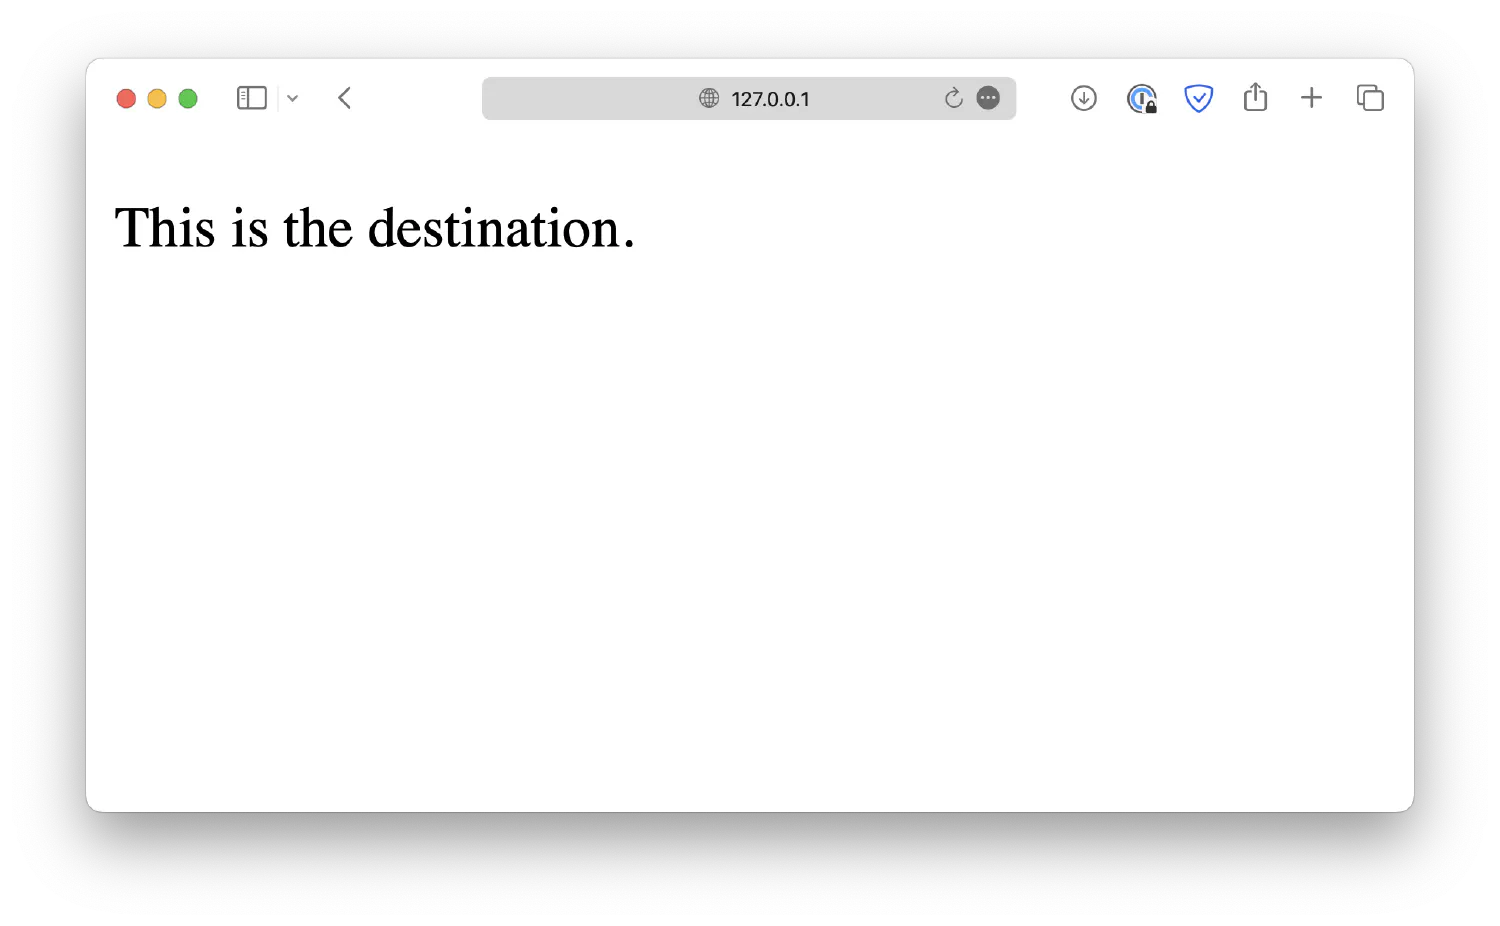
Create a destination.html file in your work directory.
| |
| |
And then, add a link in your index.html file that points to the destination.
| |
You will be taken to the destination.html document when you click on the link.
You can also add a Go Back link in the destination.html to take you back to index.html.
| |
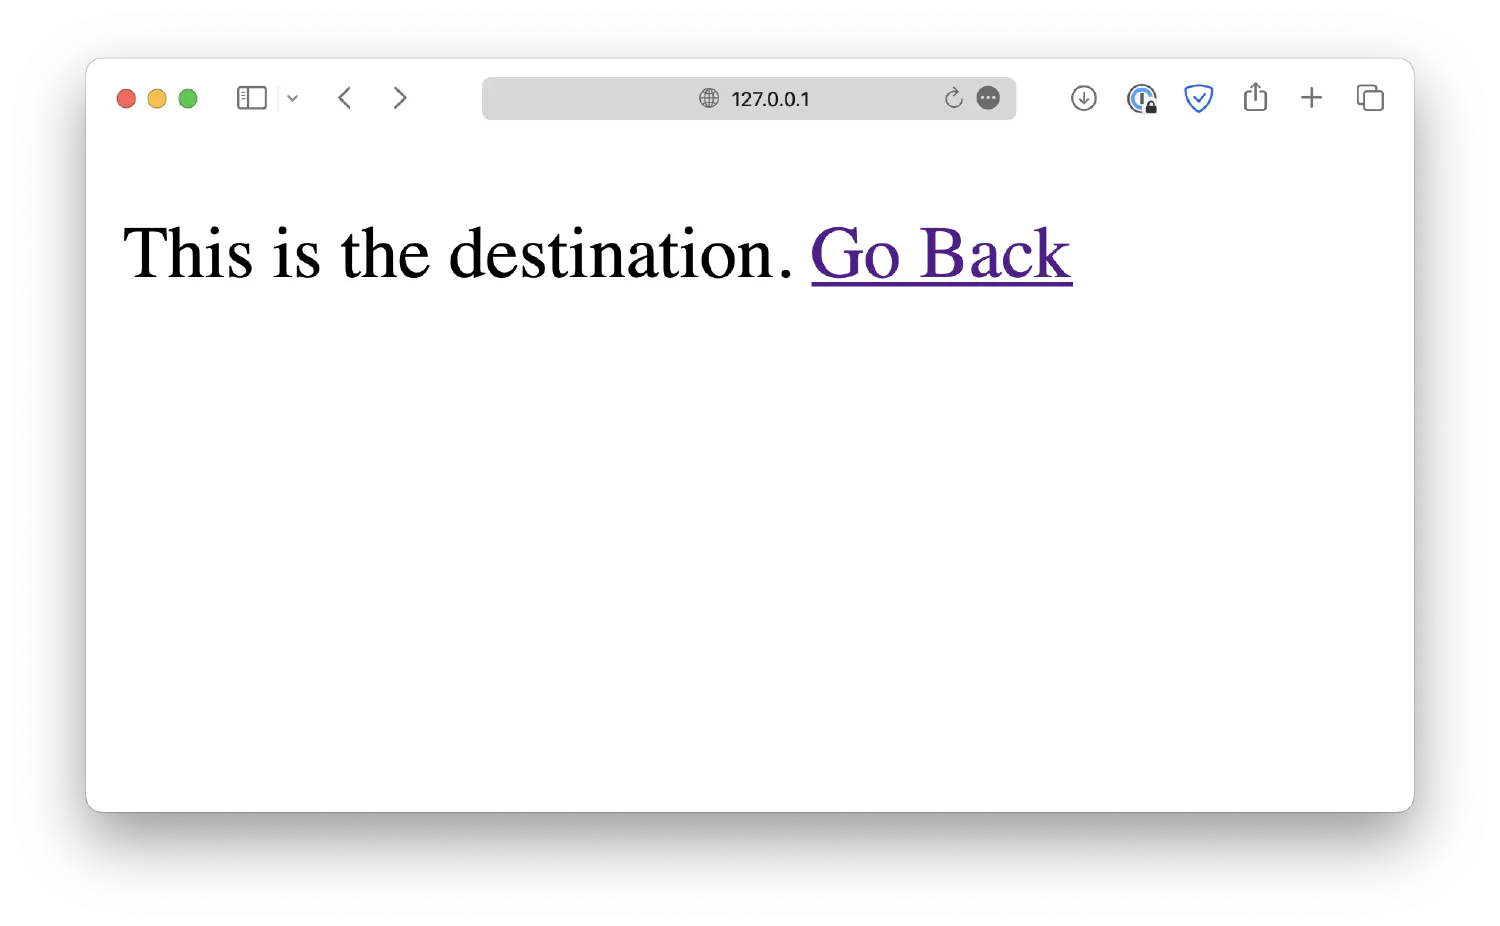
These interconnected links form the internet we see today.
By default, the linked destination will be opened in the same window. You can change that behavior by setting a target attribute. For example, target="_blank" opens the destination in a new tab.
| |
Another thing you may have noticed is that, initially, the link is displayed in blue. The moment you click on it, it turns red. And afterwards, the link becomes purple, indicating the link has been clicked before. This behavior has to do with a concept called the pseudo-class, which allows you to define different styles for an element under different conditions. We will revisit this topic when we talk more about CSS.
Lists #
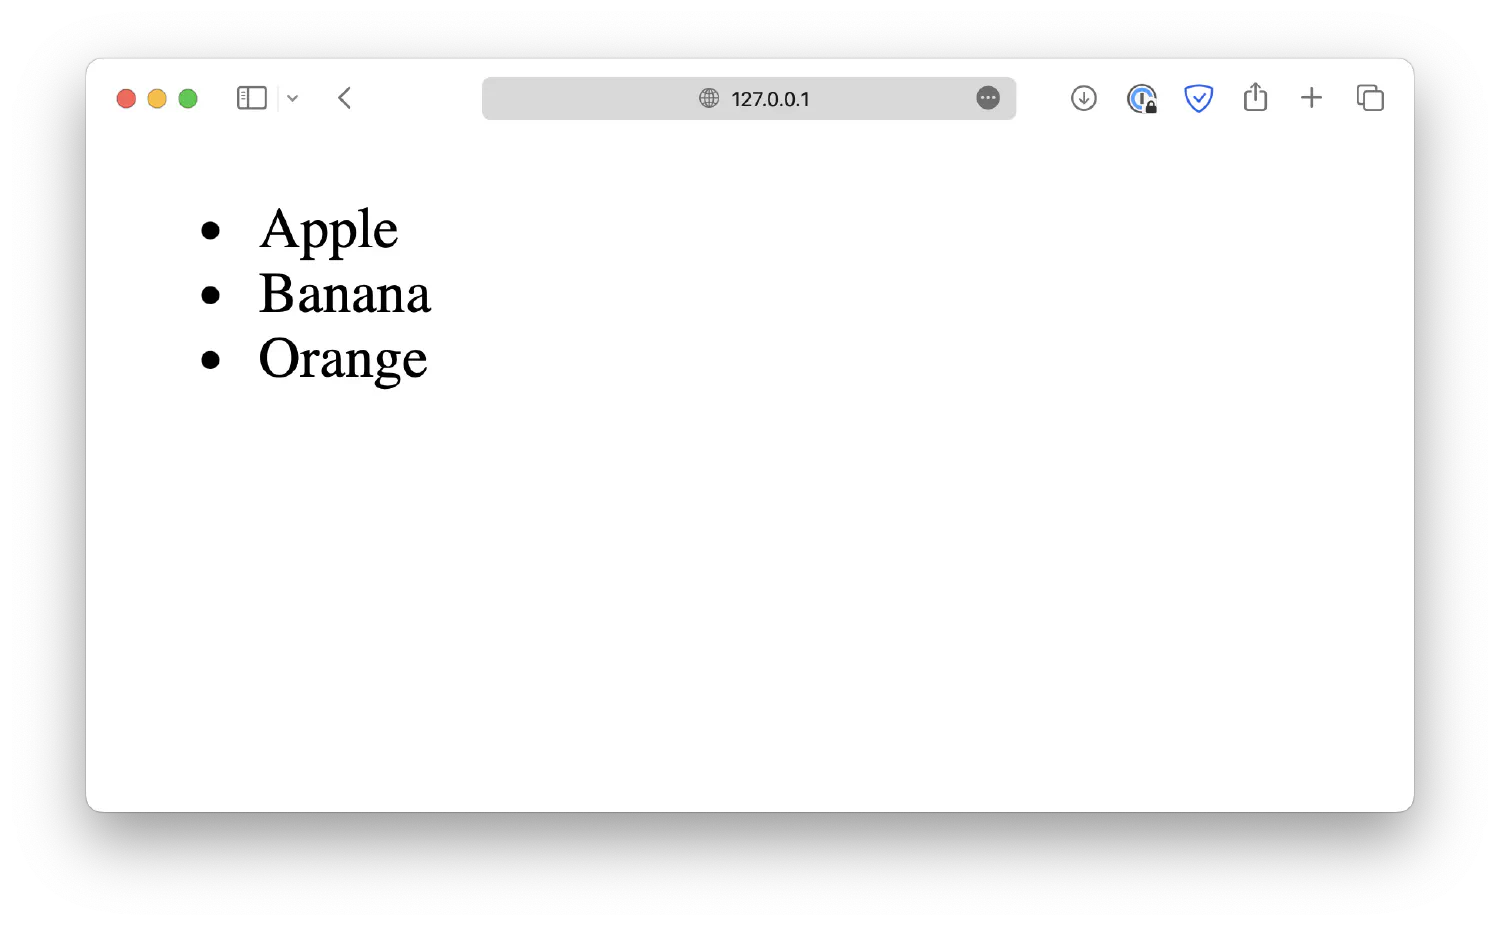
There are three different types of lists in HTML: ordered, unordered, and description lists. Ordered lists are defined with the <ol> element, and each list item is created with <li>.
| |

On the other hand, unordered lists are defined with the <ul> element.
| |
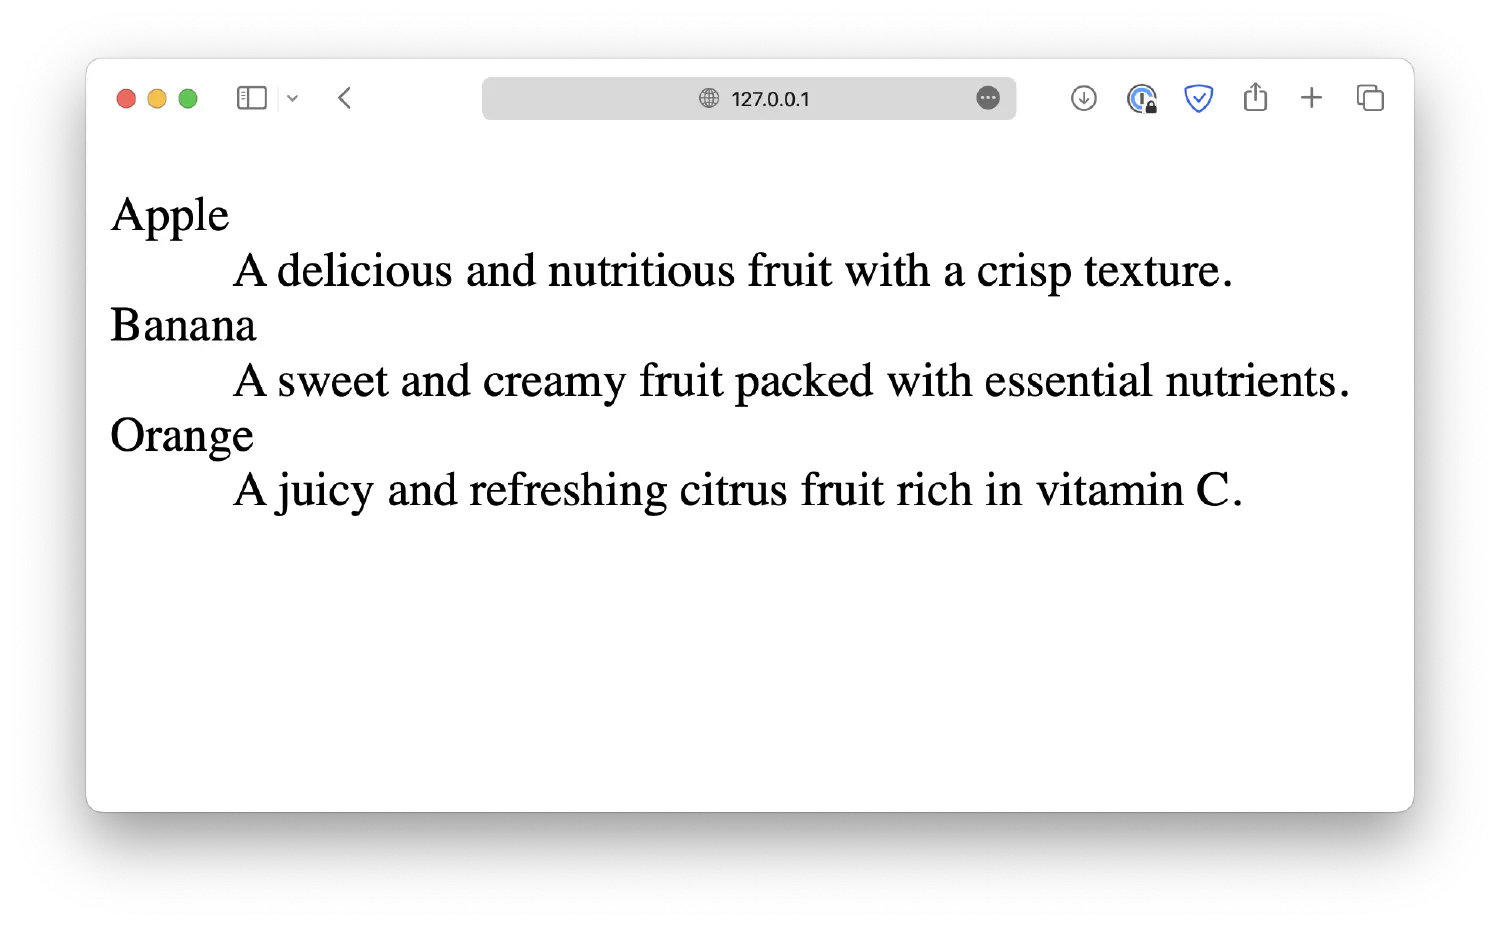
Description lists are a bit more complex, as they consist of a list of items and a description for each item. The description list is defined with the <dl> element, each item is defined with the <dt> element, and each description statement is defined with the <dd> element.
| |
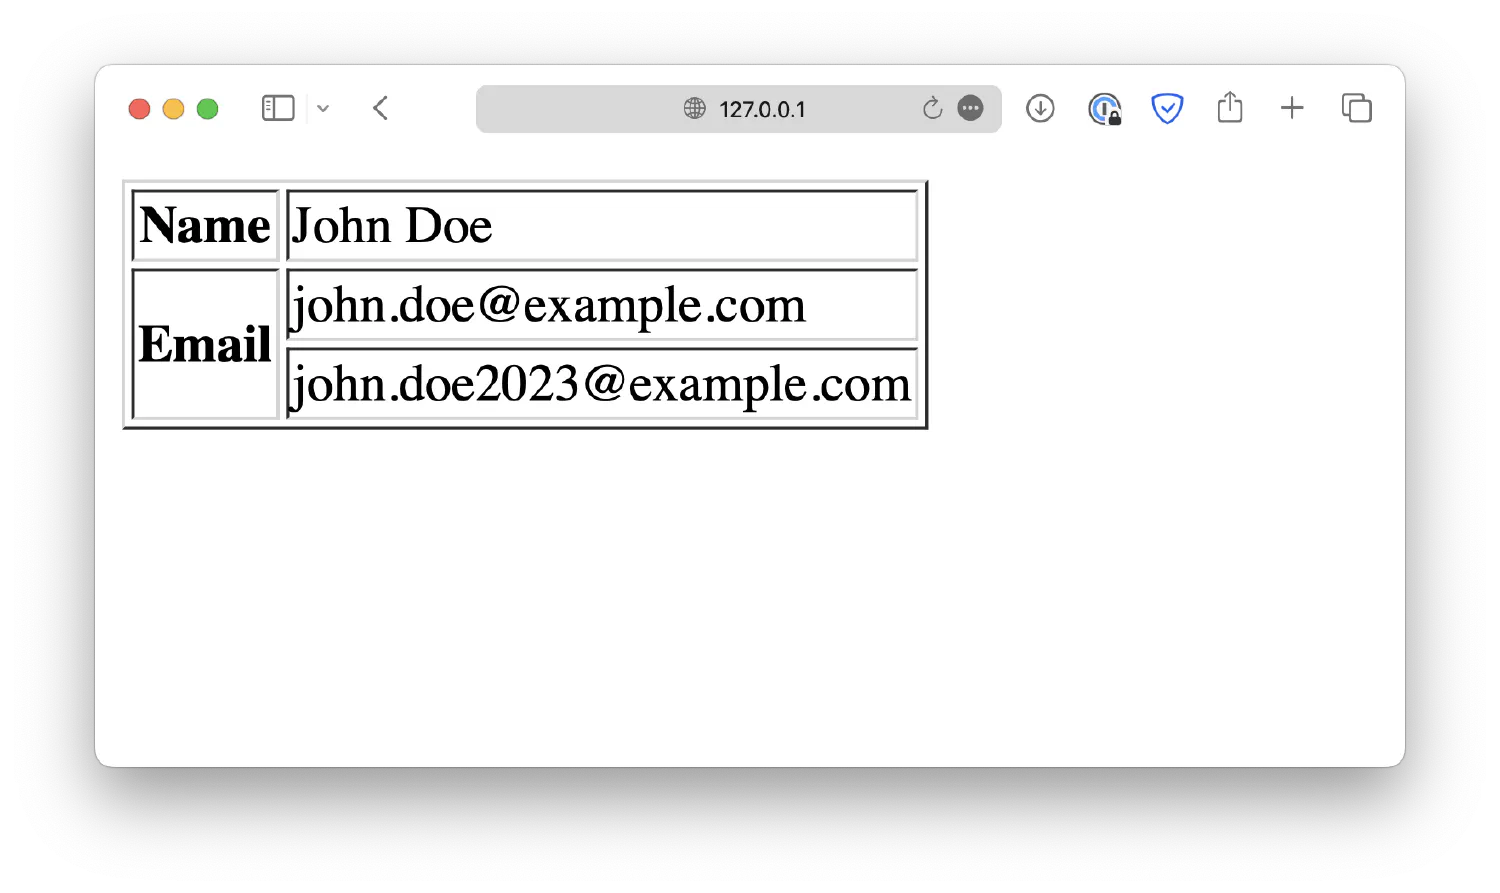
Tables #
Tables in HTML are defined with the <table> element. Inside the table, each row is defined with a <tr> element, and inside every row, each table cell is defined by a <td> element (td stands for table data).
| |
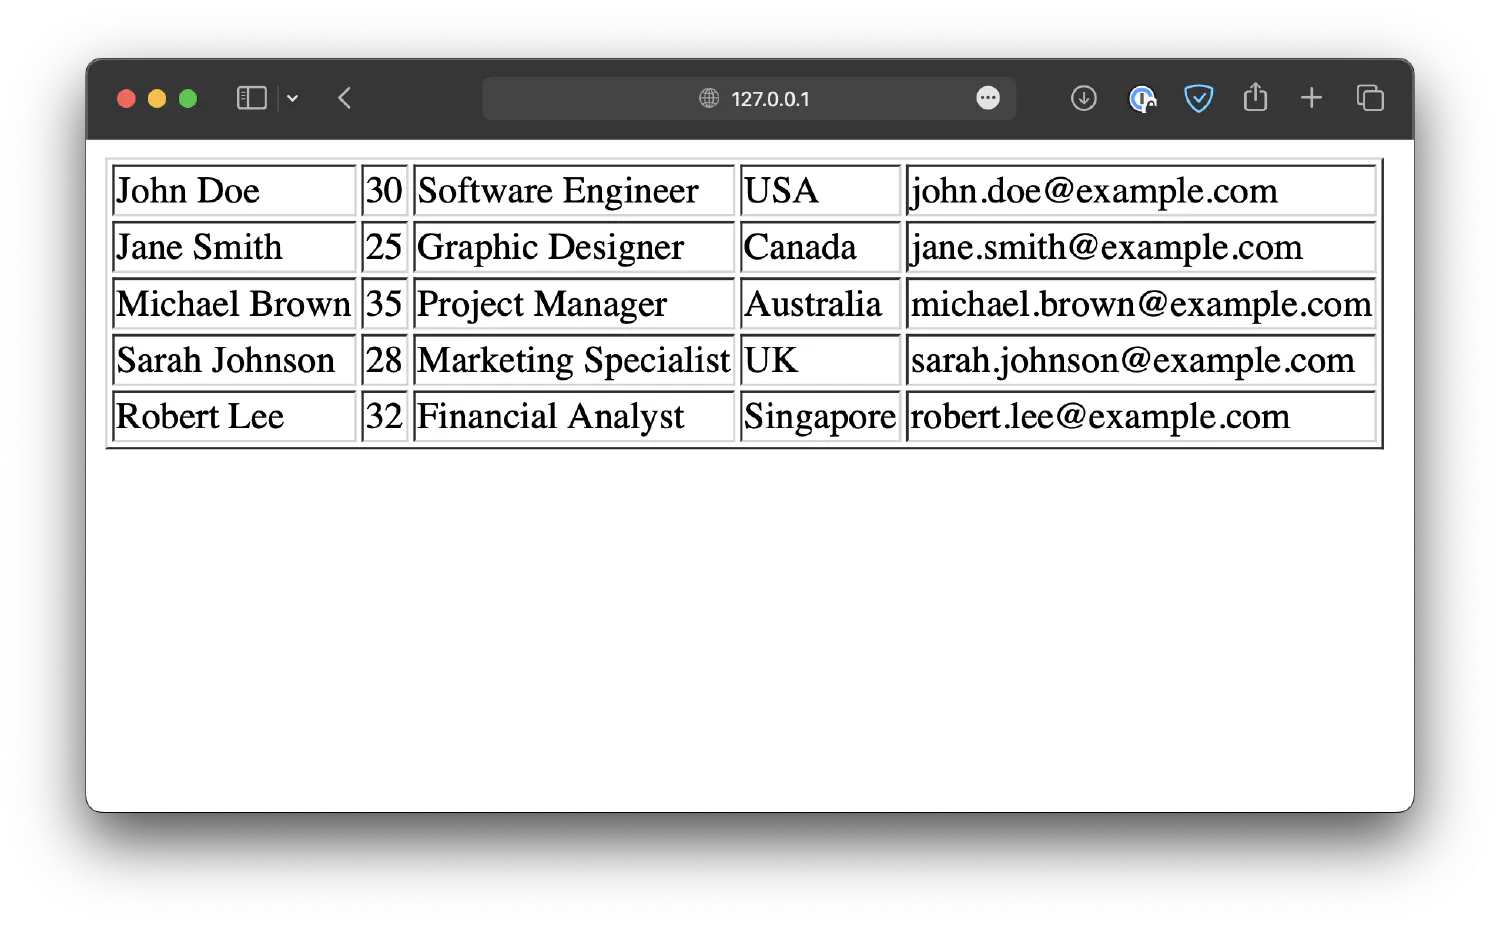
The border="1" attribute makes sure the table borders are visible, or they will be hidden by default. Please note that this is not the recommended way to deal with table borders, but we’ll have to leave this topic until the next chapter.
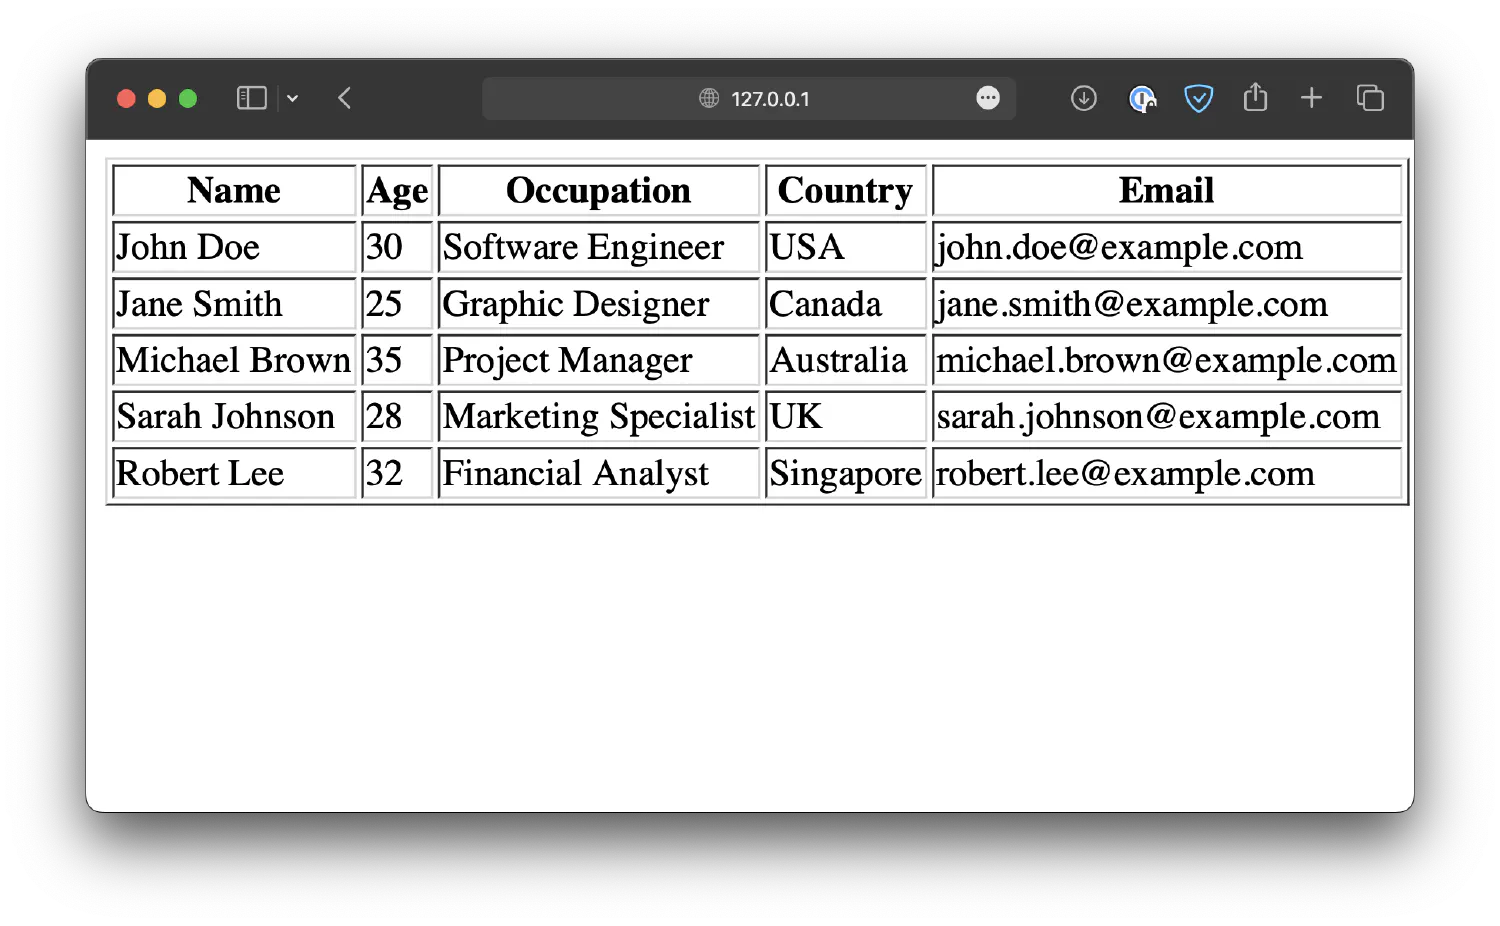
You can also add a header to this table using the <th> element. By default, the header cells will be centred and displayed in bold text.
| |
It is also possible to create a vertical header by setting the <th> element as the first table cell in every row.
| |

If you are familiar with Excel or any other table-building software, you would know that it is common to create table cells which span across multiple rows or columns. It is possible to build similar tables in HTML as well. For instance:
| |
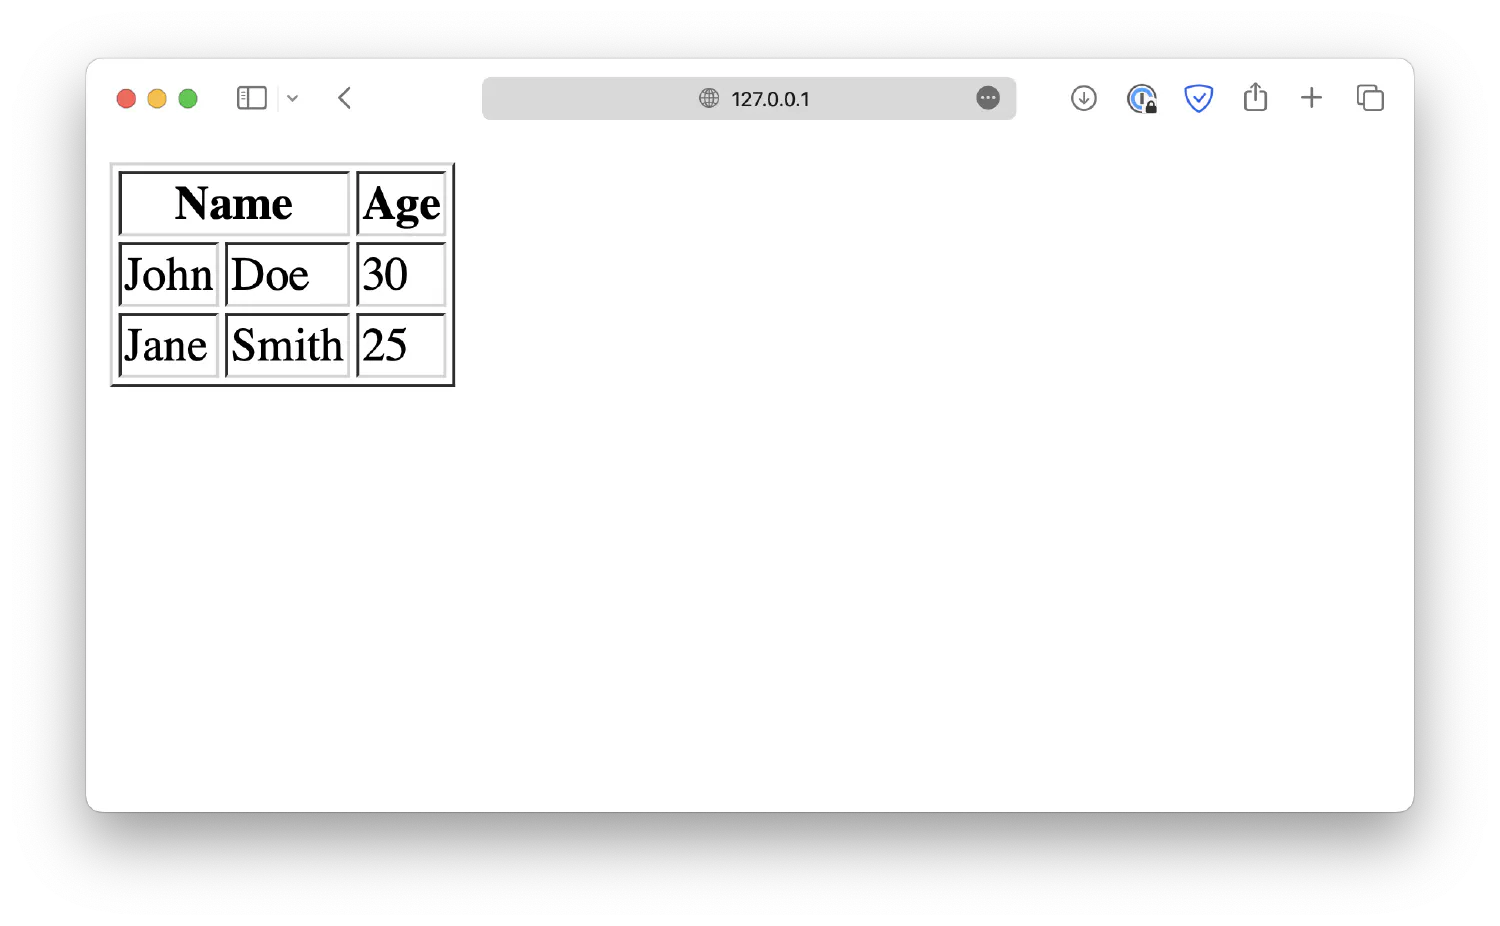
By defining the colspan attribute, the <th> element will span across two columns. Similarly, you may use the rowspan attribute to create table cells that span across multiple rows.
| |
Images and file paths #
Embedding images into your webpages can be a powerful way to convey messages that are difficult to express with words alone. HTML allows you to embed images using the <img> element.
First, place an image file at the root of your work directory.
| |
And then embed the image into index.html using the <img> element.
| |
The src attribute, short for source, points to the location of the image. In this case, your browser will search for a fox.jpg file under the same directory as your index.html. This is called a relative path. If your index.html and the image are in separate directories, it is best to use absolute path so that you don’t lose track. For example:
| |
In this case, you will need to change the path:
| |
In this example, the path starts with /, which means your browser will start at the root of the server (which is your work directory, where the live server is hosted), and then locate the images directory, and then the fox.jpg image.
However, as you can see, the embedded image is too large, so it is always good to specify a size when displaying an image. You can either use the width and height attributes. The unit is in pixels.
| |
Or you can define a style like this:
| |
Both methods will give you the same result, but it is usually recommended to let CSS handle the presentation of HTML elements.
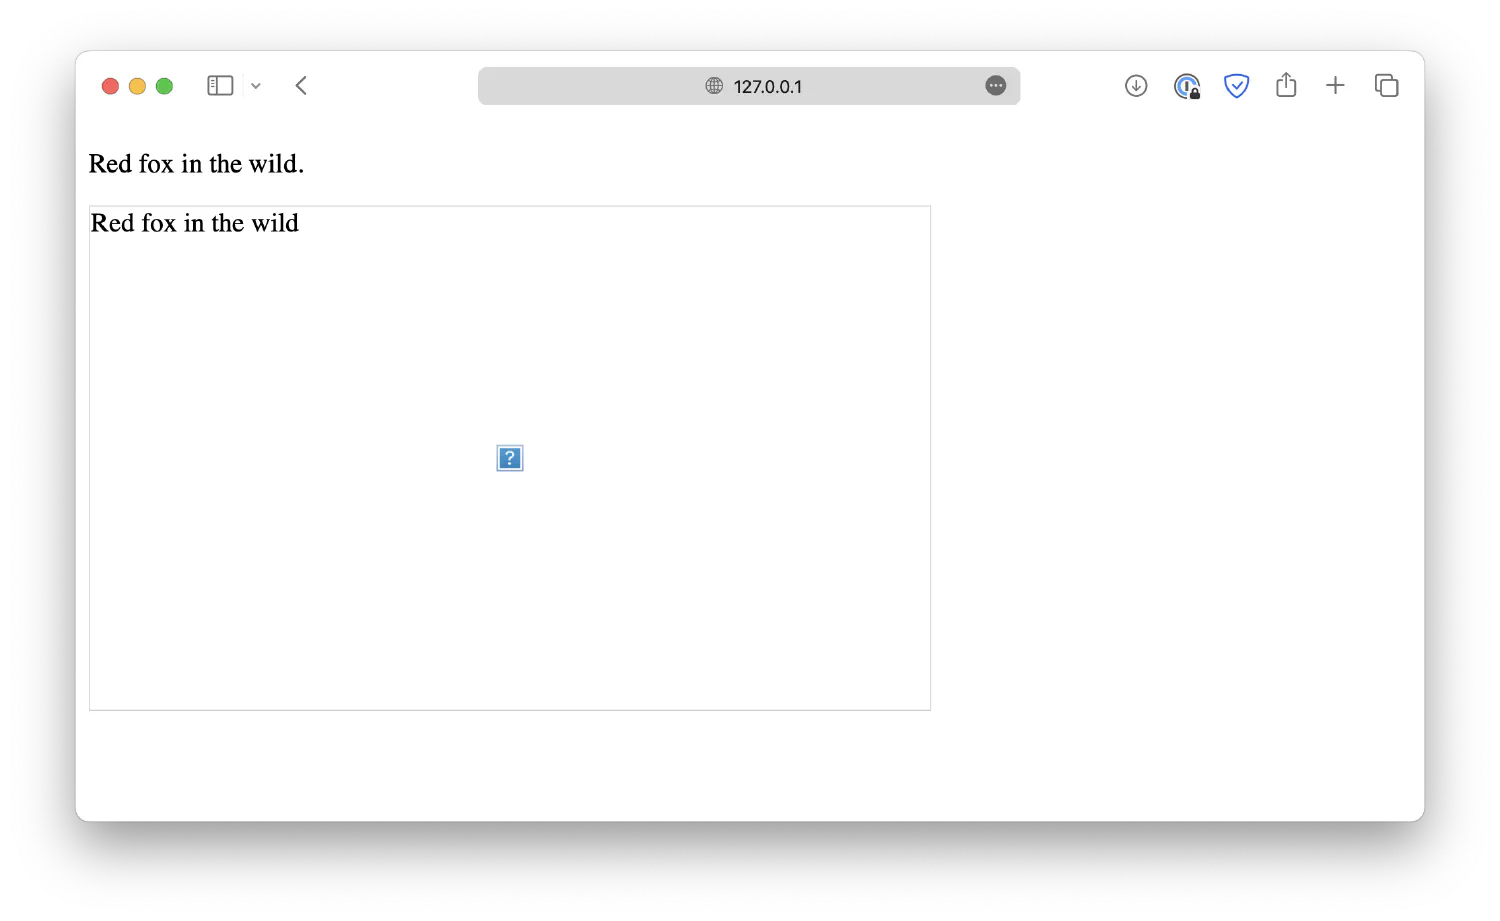
Next, go back to our first example and notice the alt attribute, which defines an alternative text for the image.
| |
In case the image fails to load or the user is using a screen reader, it’s crucial to provide alternative text that describes the content of the image. This helps ensure that your webpage is accessible to all users, regardless of their abilities or technology limitations. The alternative text should be descriptive, giving the same message as the image.
Forms #
Form is an essential component when creating your website, as it enables the user to communicate with the website owner. An HTML form is defined by the <form> element, which holds different form elements. <input> is the most commonly used form element.
| |
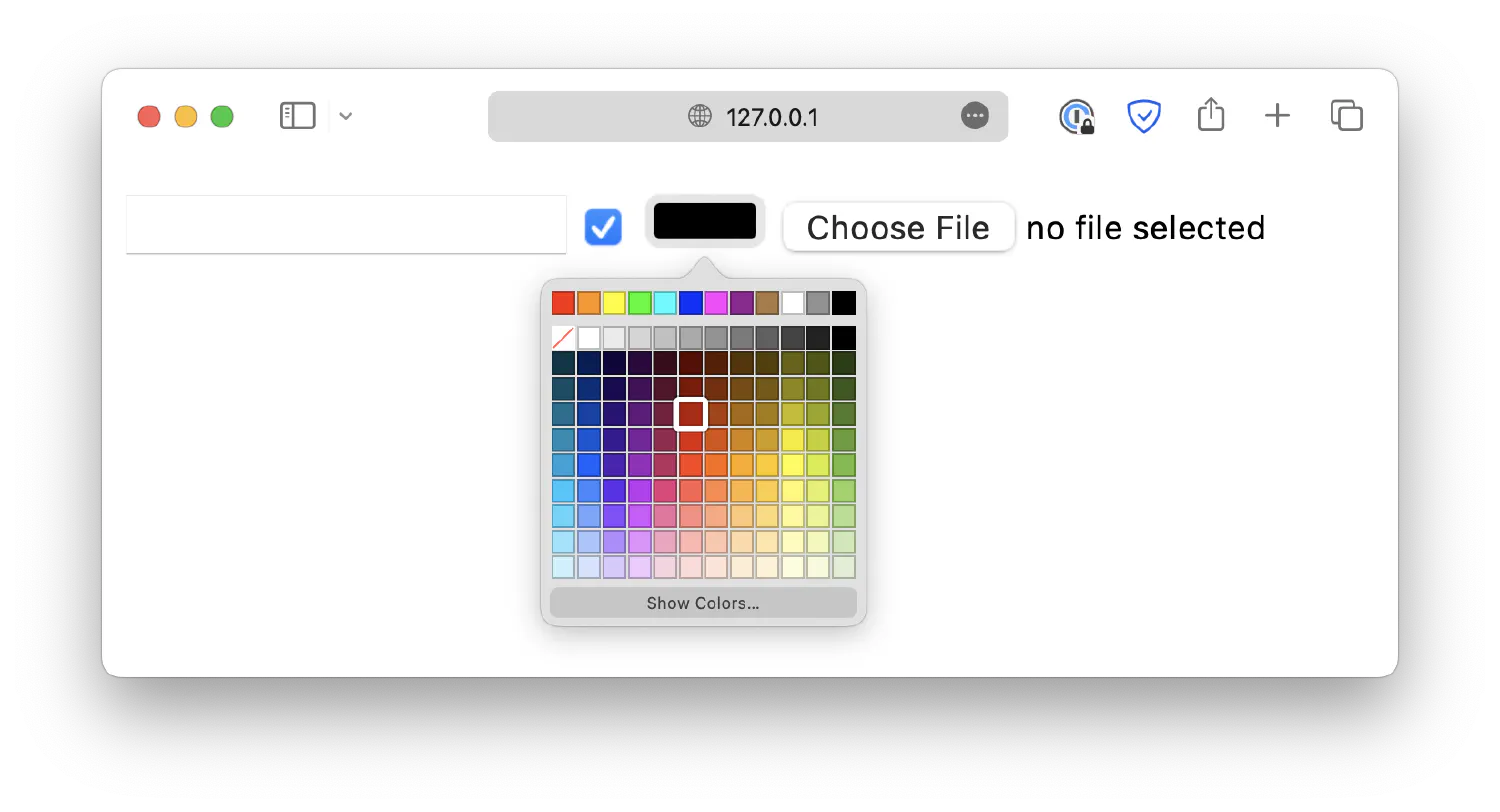
The <input> element has a type attribute, which allows the element to be displayed in different types , such as a checkbox, a color picker, a file upload field, and so on.
| |
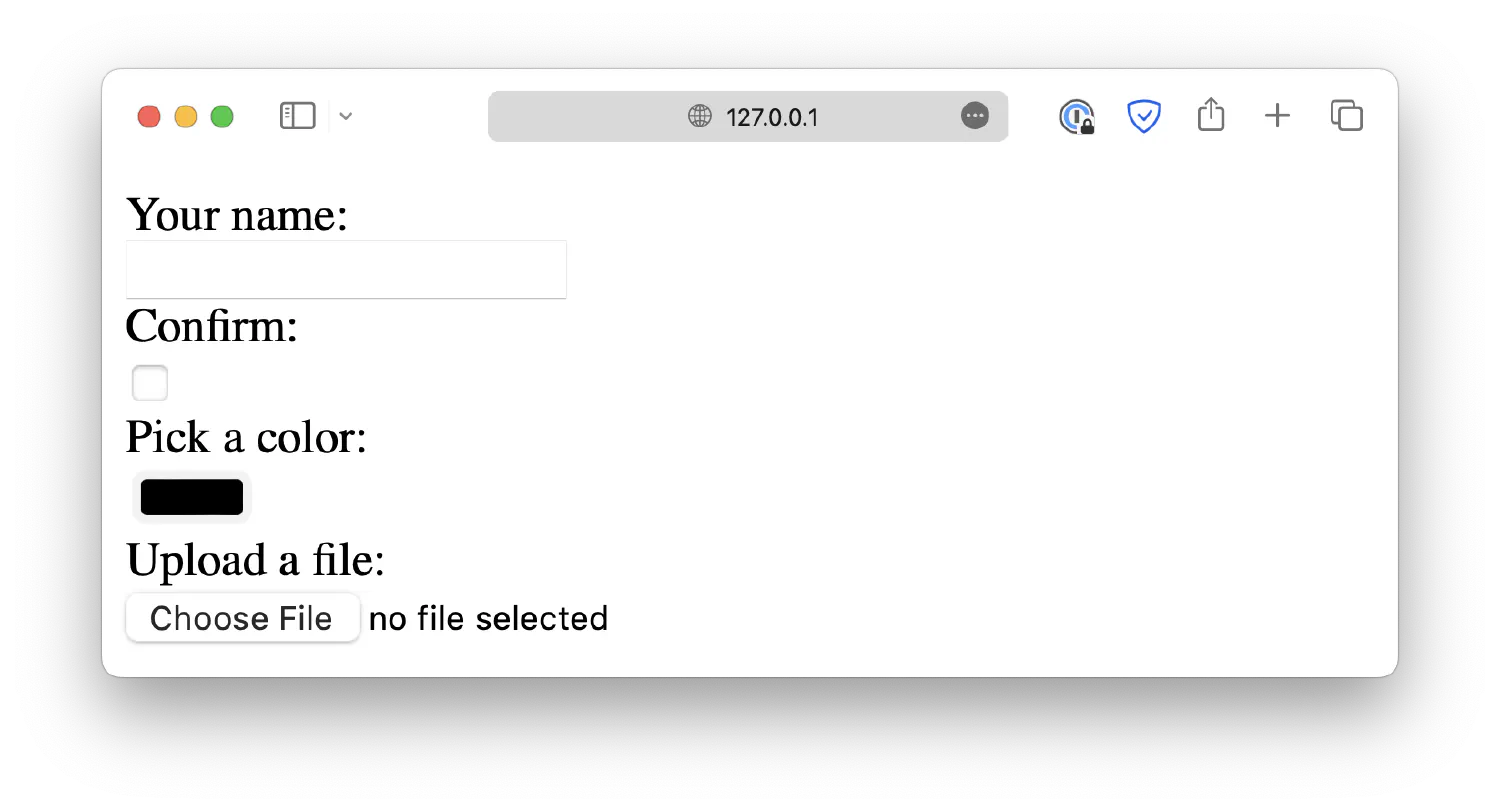
You should also use the <label> element to provide a clear and descriptive label for each form field. This helps the users understand what information is being requested and ensures that your form is accessible to all users.
| |
Make sure that the for attribute of the <label> element matches the id attribute of the corresponding <input> element.
Also, keep in mind that the id attribute must be unique throughout the entire HTML document. There should not be two elements with the same id.
The <label> elements help the user understand the purpose of the form fields, and they are particularly useful for screen reader users. When the user focuses on a field, the screen reader will read the corresponding label out loud.
The form fields also require a name attribute. When the form transmits information to the backend, the value (user input) of each field will be tied to its name, allowing you to retrieve the corresponding information in the backend.
This leads to two other very important attributes for the <form> element, action and method, as well as the <input type="submit"> element. These three components are what make the form function properly.
| |
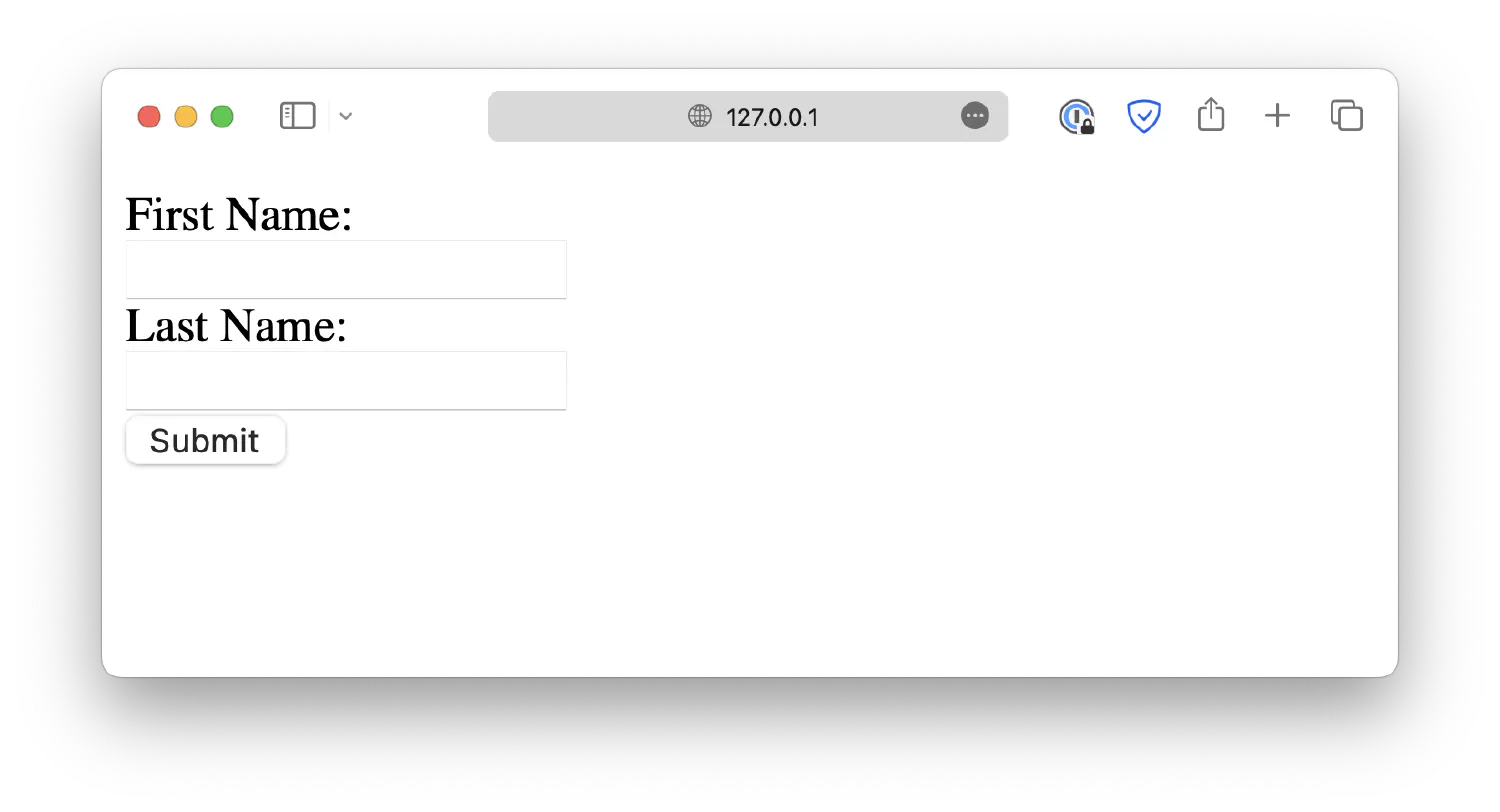
When the Submit button is clicked, that tells the browser to wrap up the user inputs and send them to the backend. However, the browser needs to know where to send the data and how to send them. This information is specified by the action and method attributes. action points to a backend program that will process the data, and method specifies an HTTP method that will be used to transmit the information. For now, you don’t need to know how the data is transferred, but if you are interested, you can read the linked article for more information on HTTP methods .
Layout elements #
So far, we’ve only been discussing elements used to display content, such as texts, lists, tables and images. In fact, there is another category of elements in HTML in charge of organizing the elements. They are not designed to display any specific type of content, but instead, they act as a container for other elements. When combined with CSS, they can create different layouts for the webpage. Some of the commonly used layout elements are shown in the list below.
<header>: Defines a header section for the document, usually located at the top of the webpage.<nav>: Defines a navigation bar. For most webpages, it is located at the top with the header, but some developers put it on the side of the page.<section>: Defines a section for the document.<article>: Defines an independent section in the webpage.<aside>: Content aside from the main content, such as a sidebar.<footer>: A footer section located at the bottom of the webpage.<details>: Creates a tab that the user can open and close.
<summary>: Creates a heading for the<details>element. It should be placed inside the<details>element.1 2 3 4<details> <summary>Lorem ipsum dolor sit amet consectetur adipisicing elit</summary> Lorem ipsum dolor sit amet consectetur. . . </details>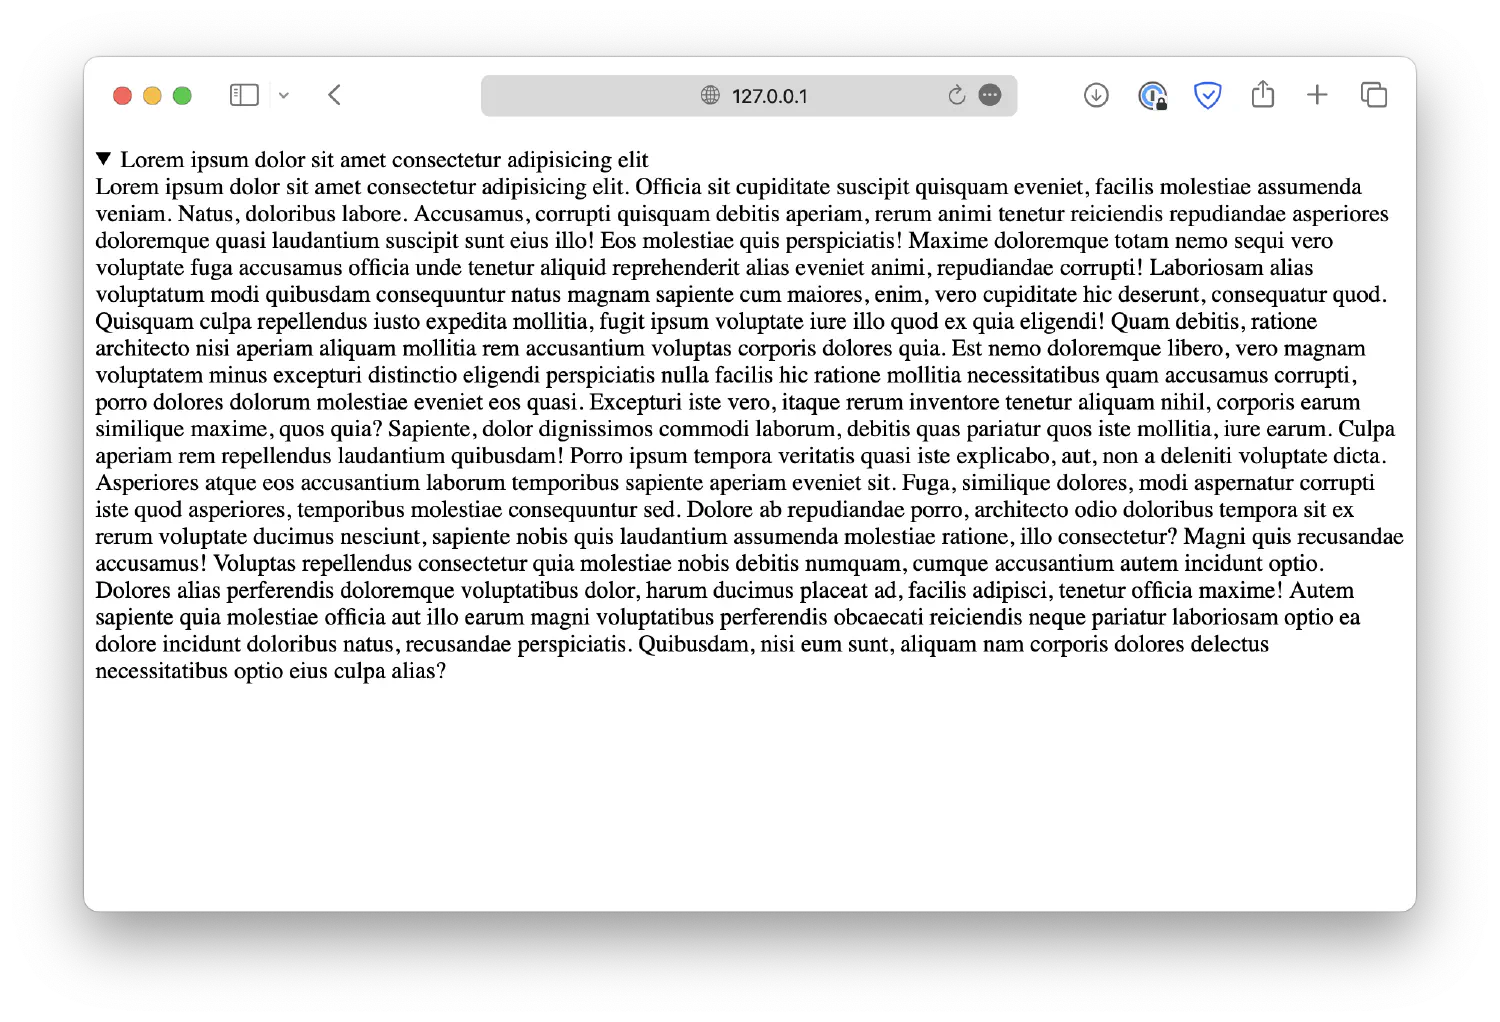
Notice that the default heading has been replaced with the one specified by
<summary>.<div>: And of course, the most important layout element,<div>, which stands for division. It is a generic element that creates a block in the webpage and does not serve any special purposes. This is the most commonly used layout element, because for real-life webpages, most sections or blocks do not match any of the semantic elements mentioned above. As a result, many developers like to use<div>for creating page layouts.
| |
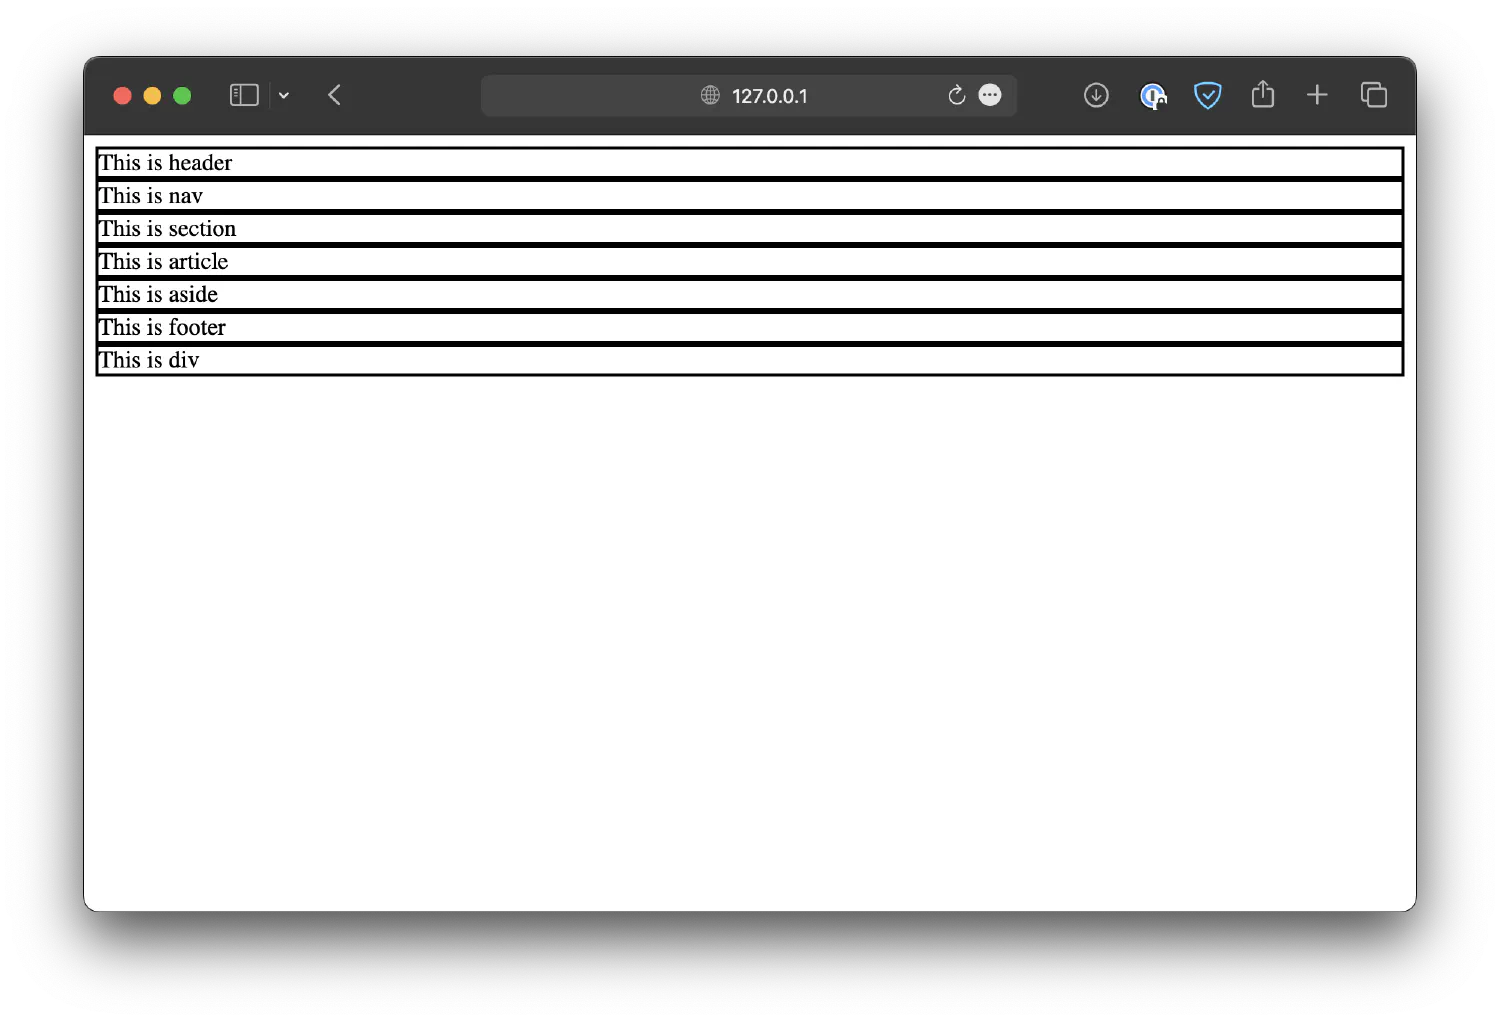
Without CSS, these layout elements (except for <details> and <summary>) will have the same appearance and not serve their specific purposes, but don’t worry, we will come back to this topic later. For now, you only need to know what they are supposed to do.
Block elements vs. inline elements #
Let’s consider the following example:
| |
Notice that the <p> element always starts on a new line and takes up as much horizontal space as possible. On the other hand, the <a> element does not start on a new line and only takes up as much space as necessary. That is, in fact, the difference between the block elements and inline elements.
Most of the elements we mentioned in this chapter are block elements, such as <p>, <div>, <h1> to <h6>, <li>, <table>, etc. Without extra styles defined, they will automatically take up as much horizontal space as possible.
The <a> element is an example of an inline element. When placed inside other elements, it only takes up as much space as necessary. And the width and height attributes will have no effects on it.
There are many other elements, both block and inline elements available in HTML. It is not possible to discuss all of them in one chapter, but here is a reference of all HTML elements from W3Schools if you are interested.
The head section #
At the beginning of this chapter, we created an HTML document that looks like this:
| |
So far, we only focused on what’s inside the <body> element, so what about the <head> section? The <head> section contains information that is not rendered but is used by the browser or the search engine for SEO (search engine optimization) purposes. For example, the <title> element is used to define the title for the webpage, which will be shown in the browser tab.
The <meta> element can be used to define the keywords, description, author, and so on.
| |
Conclusion #
In this chapter, we have explored the basics of HTML. We discussed some commonly used elements and attributes and explored many examples, such as the formatting elements, layout elements, and so on. To further expand your skills, it’s time for us to delve into CSS, a powerful tool that allows you to control the visual appearance of your HTML elements.
If you think my articles are helpful, please consider making a donation to me. Your support is greatly appreciated.