🏷️ #django #python #backend #webdev

Django for Beginners #3 - The CRUD Operations

We introduced many new concepts in the previous articles, and you probably feel a bit lost. But don’t worry, in this article, we will dig deeper and find out how the URL dispatchers, models, views, and templates can work together to create a functional Django application.

To make things easier to understand, in this article, we are not going to create a full-featured blog application with categories, tags and etc. Instead, we will create only a post page that displays a post article, a home page that shows a list of all articles, and a create/update/delete page that modifies the post.

➡️ Get the source code for FREE!

Designing the database structure #

Let’s start with the model layer. The first thing you need to do is design the database structure. Since we are only dealing with posts right now, you can go ahead to the models.py file, and create a new Post model:

blog/models.py

1
2
3
4
5
6
from django.db import models


class Post(models.Model):
    title = models.CharField(max_length=100)
    content = models.TextField()

This Post contains only two fields, title, which is a CharField with a maximum of 100 characters, and content, which is a TextField.

Generate the corresponding migration files with the following command:

1
python manage.py makemigrations

Apply the migrations:

1
python manage.py migrate

The CRUD operations #

Now, it is time for us to dive into the application itself. When building real-life applications, it is unlikely for you to create all the controllers first, and then design the templates, and then move on to the routers. Instead, you need to think from the user’s perspective, and think about what actions the user might want to take.

In general, the user should have the ability to perform four operations on each resource, which in our case, is the Post.

  • Create: This operation is used to insert new data into the database.
  • Read: This operation is used to retrieve data from the database.
  • Update: This operation is used to modify existing data in the database.
  • Delete: This operation is used to remove data from the database.

Together, they are referred to as the CRUD operations.

The create action #

First, let’s start with the create action. Currently, the database is still empty, so the user must create a new post. To complete this create action, you need a URL dispatcher that points the URL pattern /post/create/ to the post_create() view function.

The post_create() view function should have a flow control (if statement), if the request method is GET, return a template that contains an HTML form, allowing the user to pass information to the backend (form submission should be a POST request). If the request method is POST, a new Post resource should be created and saved.

Here is a brief review on HTTP methods in case you need a refresher:

  • The GET method is the most commonly used HTTP request method. It is used to request data and resources from the server.
  • The POST method is used to send data to the server, used for creating/updating a resource.
  • The HEAD method works just like the GET method. Except the HTTP response will only contain the head and not the body. This method is usually used by developers for debugging purposes.
  • The PUT method is similar to POST, with one small difference. When you POST a resource that already exists on the server, this action would not cause any difference. The PUT method, however, will duplicate that resource, every time you make the request.
  • The DELETE method removes a resource from the server.

Let us start with the URL dispatcher, go to urls.py:

djangoBlog/urls.py

1
2
3
4
5
6
from django.urls import path
from blog import views

urlpatterns = [
    path("post/create/", views.post_create, name="create"),
]

Then you’ll need a post_create() view function. Go to views.py and add the following code:

blog/views.py

 1
 2
 3
 4
 5
 6
 7
 8
 9
10
11
from django.shortcuts import redirect, render
from .models import Post


def post_create(request):
    if request.method == "GET":
        return render(request, "post/create.html")
    elif request.method == "POST":
        post = Post(title=request.POST["title"], content=request.POST["content"])
        post.save()
        return redirect("home")

The post_create() function first examines the method of the HTTP request, if it is a GET method, return the create.html template, if it is a POST, use the information passed by that POST request to create a new Post instance, and after it is done redirect to the home page (we’ll create this page in the next step).

Next, time to create the create.html template. First of all, you need a layout.html:

templates/layout.html

 1
 2
 3
 4
 5
 6
 7
 8
 9
10
11
12
13
14
15
16
17
18
19
20
21
22
23
24
25
26
27
28
29
30
31
32
33
34
35
36
37
38
39
40
41
42
43
44
<!DOCTYPE html>
<html lang="en">

<head>
    <meta charset="UTF-8">
    <meta http-equiv="X-UA-Compatible" content="IE=edge">
    <meta name="viewport" content="width=device-width, initial-scale=1.0">
    <script src="https://cdn.tailwindcss.com"></script>
    {% block title %}{% endblock %}
</head>

<body class="container mx-auto font-serif">
    <div class="bg-white text-black font-serif">
        <div id="nav">
            <nav class="flex flex-row justify-between h-16 items-center shadow-md">
                <div class="px-5 text-2xl">
                    <a href="/">
                        My Blog
                    </a>
                </div>
                <div class="hidden lg:flex content-between space-x-10 px-10 text-lg">
                    <a href="{% url 'create' %}" class="hover:underline hover:underline-offset-1">New Post</a>
                    <a href="https://github.com/ericnanhu" class="hover:underline hover:underline-offset-1">GitHub</a>
                </div>
            </nav>
        </div>

        {% block content %}{% endblock %}

        <footer class="bg-gray-700 text-white">
            <div
                class="flex justify-center items-center sm:justify-between flex-wrap lg:max-w-screen-2xl mx-auto px-4 sm:px-8 py-10">
                <p class="font-serif text-center mb-3 sm:mb-0">Copyright © <a href="https://www.ericsdevblog.com/"
                        class="hover:underline">Eric Hu</a></p>

                <div class="flex justify-center space-x-4">
                    . . .
                </div>
            </div>
        </footer>
    </div>
</body>

</html>

Notice the {% url 'create' %} on line 22. This is how you can reverse resolute URLs based on their names. The name create matches the name you gave to the post/create/ dispatcher.

I also added TailwindCSS through a CDN on line 8 to make this page look better, but you shouldn’t do this in the production environment.

Next, create the create.html template. I choose to create a post directory for it to make it clear that this template is for creating a post, but you can do this differently as long as it makes sense to you:

templates/post/create.html

 1
 2
 3
 4
 5
 6
 7
 8
 9
10
11
12
13
14
15
16
17
18
19
20
21
22
23
24
{% extends 'layout.html' %}

{% block title %}
<title>Create</title>
{% endblock %}

{% block content %}
<div class="w-96 mx-auto my-8">
    <h2 class="text-2xl font-semibold underline mb-4">Create new post</h2>
    <form action="{% url 'create' %}" method="POST">
        {% csrf_token %}
        <label for="title">Title:</label><br>
        <input type="text" id="title" name="title"
            class="p-2 w-full bg-gray-50 rounded border border-gray-300 focus:ring-3 focus:ring-blue-300"><br>
        <br>
        <label for="content">Content:</label><br>
        <textarea type="text" id="content" name="content" rows="15"
            class="p-2 w-full bg-gray-50 rounded border border-gray-300 focus:ring-3 focus:ring-blue-300"></textarea><br>
        <br>
        <button type="submit"
            class="font-sans text-white bg-blue-700 hover:bg-blue-800 focus:ring-4 focus:outline-none focus:ring-blue-300 font-medium rounded-md text-sm w-full px-5 py-2.5 text-center">Submit</button>
    </form>
</div>
{% endblock %}

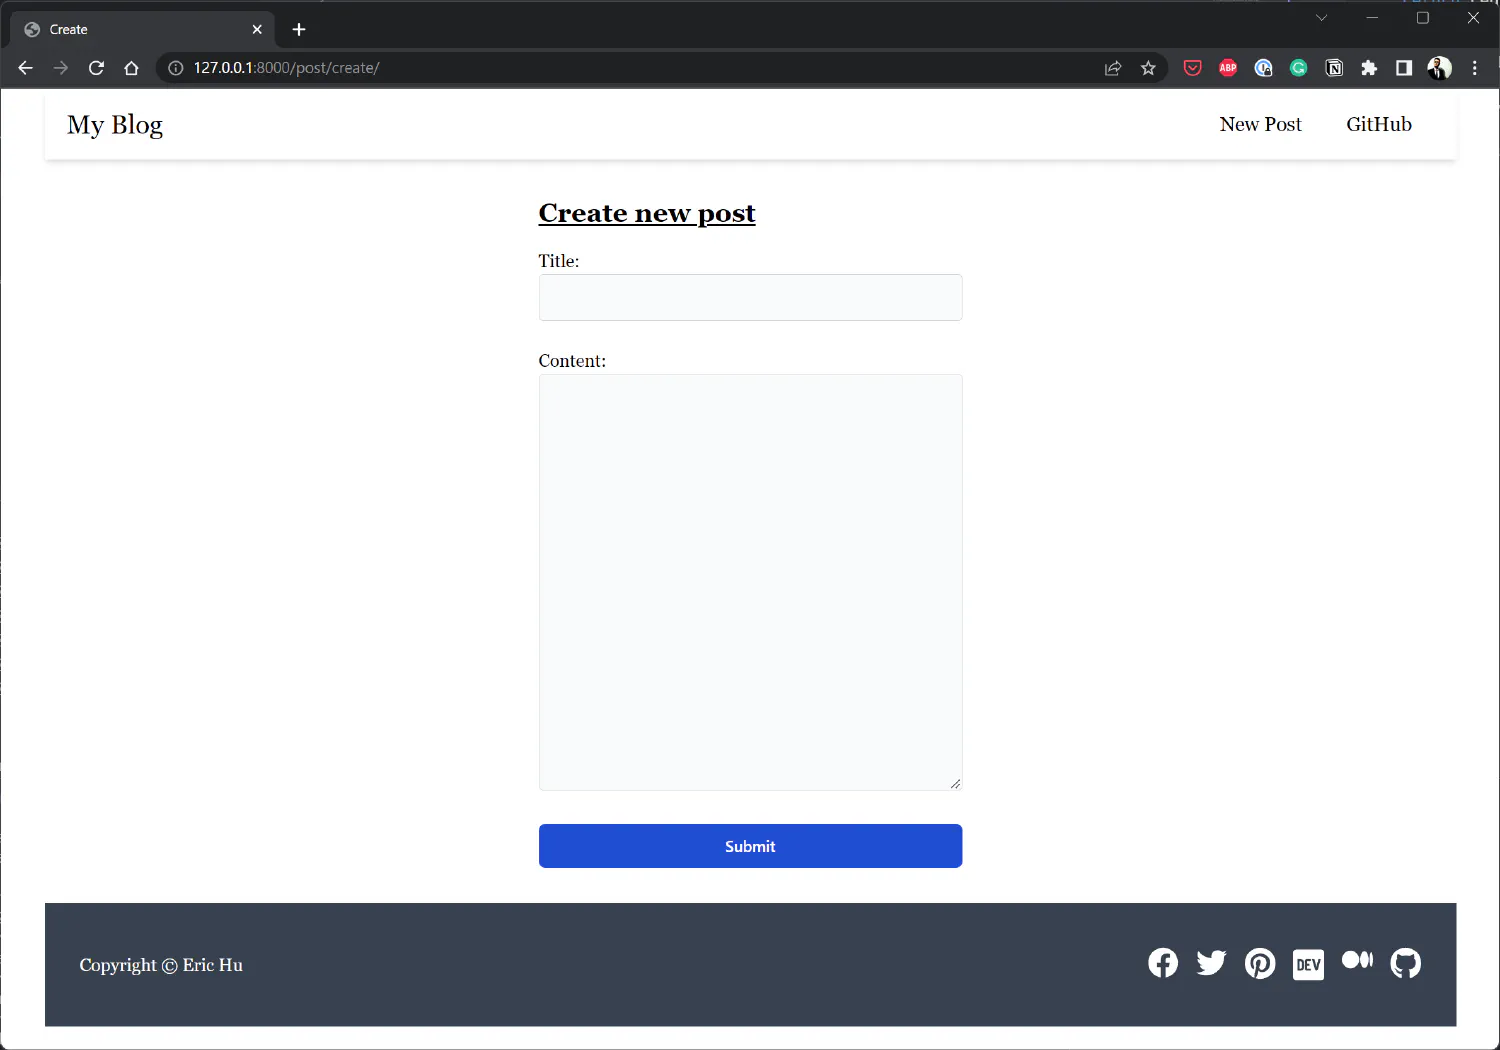
Line 10 specifies the action this form will take when it is submitted, and the request method it will use.

Line 11 adds CSRF protection to the form for security purposes.

Also pay attention to the <input> field on line 13 and 14. Its name attribute is very important. When the form is submitted, the user input will be tied to this name attribute, and you can then retrieve that input in the view function like this:

1
title=request.POST["title"]

Same for the <textarea> on line 17 and 18.

And finally, the button must have type="submit" for it to work.

The list action #

Now let’s create a home page where you can show a list of all posts. You can start with the URL again:

djangoBlog/urls.py

1
path("", views.post_list, name="home"),

And then the view function:

blog/views.py

1
2
3
def post_list(request):
    posts = Post.objects.all()
    return render(request, "post/list.html", {"posts": posts})

The list.html template:

 1
 2
 3
 4
 5
 6
 7
 8
 9
10
11
12
13
14
{% extends 'layout.html' %}

{% block title %}
<title>My Blog</title>
{% endblock %}

{% block content %}
<div class="max-w-screen-lg mx-auto my-8">
    {% for post in posts %}
    <h2 class="text-2xl font-semibold underline mb-2"><a href="{% url 'show' post.pk %}">{{ post.title }}</a></h2>
    <p class="mb-4">{{ post.content | truncatewords:50 }}</p>
    {% endfor %}
</div>
{% endblock %}

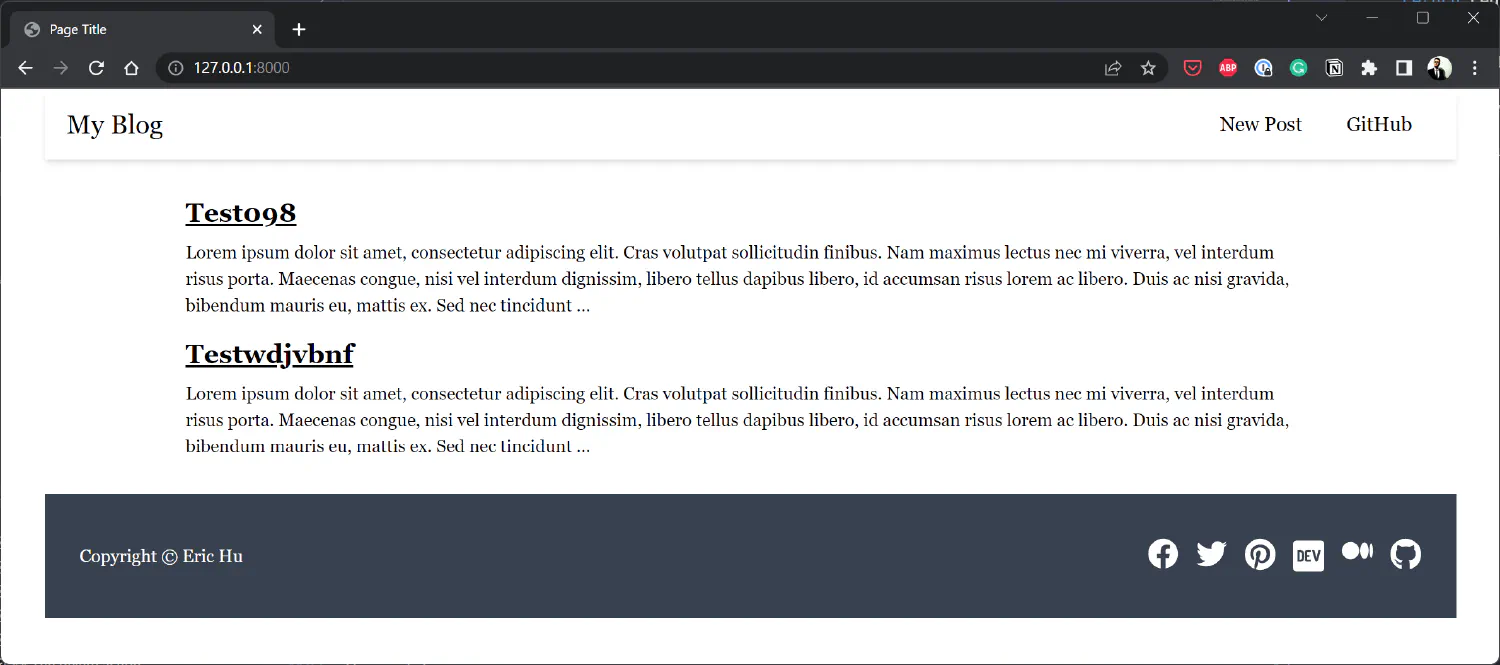
The {% for post in posts %} iterates over all posts, and each item is assigned to the variable post.

The {% url 'show' post.pk %} passes the primary key of the post to the show URL dispatcher, which we’ll create later.

And finally, {{ post.content | truncatewords:50 }} uses a filter truncatewords to truncate the content to the first 50 words.

The show action #

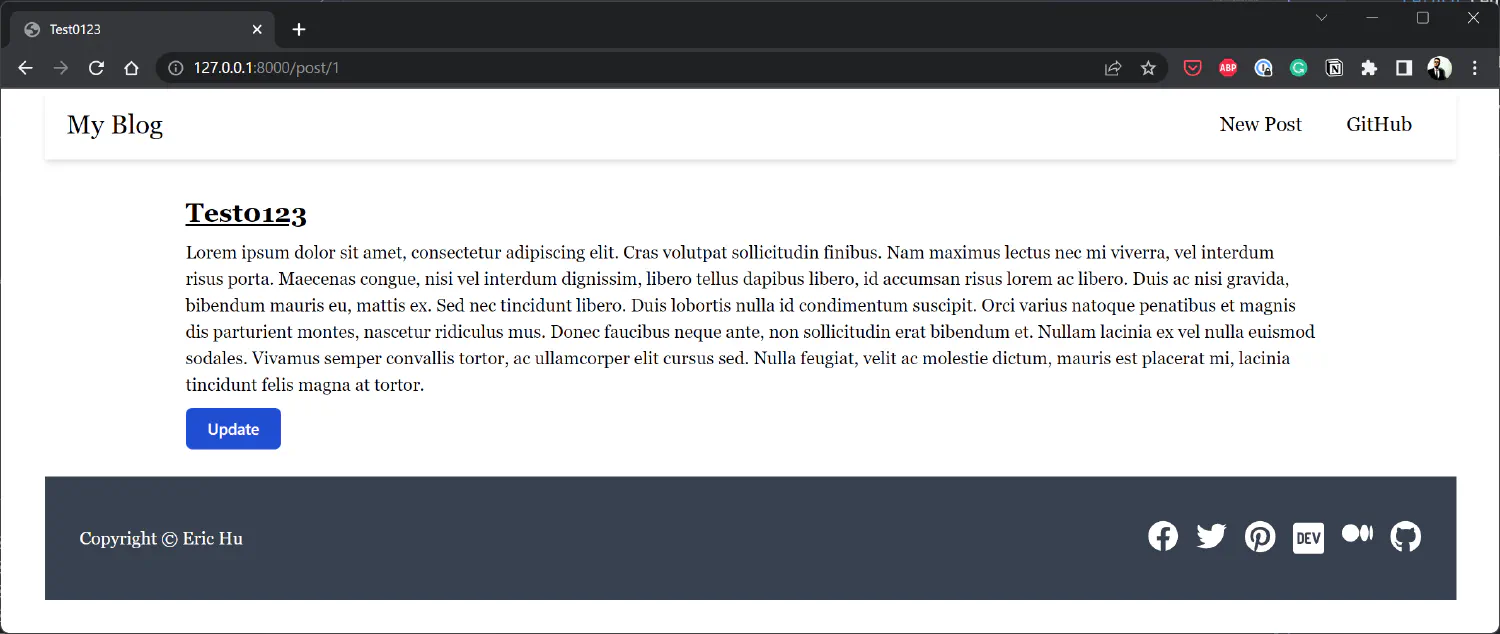
Next, the show action should display the content of a particular post, which means its URL should contain something unique that allows Django to locate just one Post instance. That something is usually the primary key.

djangoBlog/urls.py

1
path("post/<int:id>", views.post_show, name="show"),

The integer following post/ will be assigned to the variable id, and passed to the view function.

blog/views.py

1
2
3
def post_show(request, id):
    post = Post.objects.get(pk=id)
    return render(request, "post/show.html", {"post": post})

And again, the corresponding template:

templates/post/show.html

 1
 2
 3
 4
 5
 6
 7
 8
 9
10
11
12
13
14
15
{% extends 'layout.html' %}

{% block title %}
<title>{{ post.title }}</title>
{% endblock %}

{% block content %}
<div class="max-w-screen-lg mx-auto my-8">

    <h2 class="text-2xl font-semibold underline mb-2">{{ post.title }}</h2>
    <p class="mb-4">{{ post.content }}</p>

    <a href="{% url 'update' post.pk %}" class="font-sans text-white bg-blue-700 hover:bg-blue-800 focus:ring-4 focus:outline-none focus:ring-blue-300 font-medium rounded-md text-sm w-full px-5 py-2.5 text-center">Update</a>
</div>
{% endblock %}

The update action #

The URL dispatcher:

djangoBlog/urls.py

1
path("post/update/<int:id>", views.post_update, name="update"),

The view function:

blog/views.py

 1
 2
 3
 4
 5
 6
 7
 8
 9
10
11
12
13
def post_update(request, id):
    if request.method == "GET":
        post = Post.objects.get(pk=id)
        return render(request, "post/update.html", {"post": post})
    elif request.method == "POST":
        post = Post.objects.update_or_create(
            pk=id,
            defaults={
                "title": request.POST["title"],
                "content": request.POST["content"],
            },
        )
        return redirect("home")

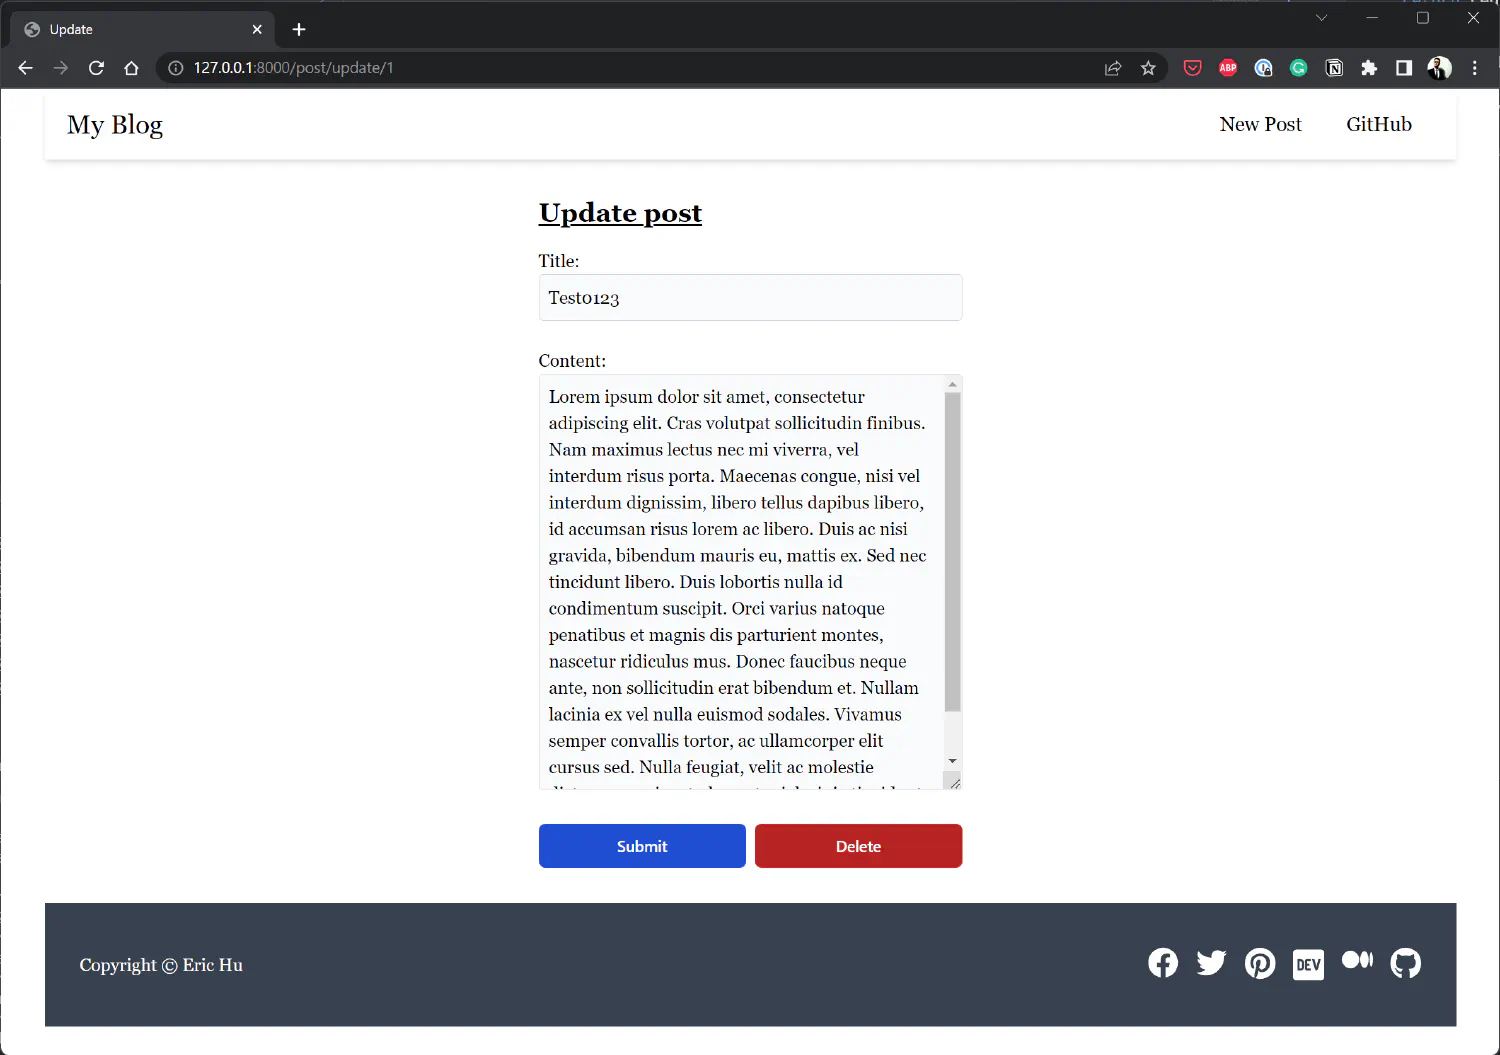
The update_or_create() method is a new method added in Django 4.1.

The corresponding template:

templates/post/update.html

 1
 2
 3
 4
 5
 6
 7
 8
 9
10
11
12
13
14
15
16
17
18
19
20
21
22
23
24
25
26
27
28
29
{% extends 'layout.html' %}

{% block title %}
<title>Update</title>
{% endblock %}

{% block content %}
<div class="w-96 mx-auto my-8">
    <h2 class="text-2xl font-semibold underline mb-4">Update post</h2>
    <form action="{% url 'update' post.pk %}" method="POST">
        {% csrf_token %}
        <label for="title">Title:</label><br>
        <input type="text" id="title" name="title" value="{{ post.title }}"
            class="p-2 w-full bg-gray-50 rounded border border-gray-300 focus:ring-3 focus:ring-blue-300"><br>
        <br>
        <label for="content">Content:</label><br>
        <textarea type="text" id="content" name="content" rows="15"
            class="p-2 w-full bg-gray-50 rounded border border-gray-300 focus:ring-3 focus:ring-blue-300">{{ post.content }}</textarea><br>
        <br>
        <div class="grid grid-cols-2 gap-x-2">
            <button type="submit"
            class="font-sans text-white bg-blue-700 hover:bg-blue-800 focus:ring-4 focus:outline-none focus:ring-blue-300 font-medium rounded-md text-sm w-full px-5 py-2.5 text-center">Submit</button>
        <a href="{% url 'delete' post.pk %}"
            class="font-sans text-white bg-red-700 hover:bg-red-800 focus:ring-4 focus:outline-none focus:ring-red-300 font-medium rounded-md text-sm w-full px-5 py-2.5 text-center">Delete</a>
        </div>

    </form>
</div>
{% endblock %}

The delete action #

Finally, for the delete action:

djangoBlog/urls.py

1
path("post/delete/<int:id>", views.post_delete, name="delete"),

blog/views.py

1
2
3
4
def post_delete(request, id):
    post = Post.objects.get(pk=id)
    post.delete()
    return redirect("home")

This action does not require a template, since it just redirects you to the home page after the action is completed.

Start the server #

Finally, let’s start the dev server and see the result.

1
python manage.py runserver

The home page:

The home page

The create page:

The create page

The show page:

The show page

The update page:

The update page


If you think my articles are helpful, please consider making a donation to me. Your support is greatly appreciated.

Subscribe to my newsletter ➡️

✅ News and tutorials every other Monday

✅ Unsubscribe anytime

✅ No spam. Always free.